Showing posts with label UpYourArt. Show all posts

Thursday, 22 November 2012

XMAS EXTRA'S /SNAGS - UYA


Photobucket


Extras available from me Fotki HERE

using the Beautiful artwork of Steve Baier you can purchase  tubes from UYA.

scrap kit used was a PTU one - Christmas Cards by me HERE OR HERE

Wednesday, 3 October 2012

EA - Superstar - how to add sparkles -custom

this tag tutorial was written by me any resemblance to any other tut is purely coincidental
 Photobucket

For this tut I am using the fantastic artwork of Elizabeth Austin
you can purchase her tubes from UYA.
i used the tube entitled Deliah

frame was one of my own from my Autumn kit but any similar frame would work
I also used 2 masks by VixPSP HERE and HERE
Filters used were: Alien Skin xenofex Constellation
 and Eye candy5 - impact - perspective shadow
....................................................
open up a canvas 630 x 630 pixles

I used frame from my Autumn kit if using the same resize by 60% if not resize to suit
then rotate left by 5

click inside frame with the magic wand tool
open up dark brown paper I used one from my Autumn kit no7 and resize by 60% copy and paste as a new layer

go to selections invert and hit delete key on the keyboard

add tube as a new layer, arrange and hit the delete key again  to remove the excess
change the blend mode to screen. by going to Layers - Properties  - and in the dropdown choose screen
slide below the frame

add light brown paper no7 and apply bigmask2 - number17 by vix
by going to Layers - Load/save mask from disk and choose number17 mask...
click apply or ok. depending on your version of PSP

go to Layers -merge group
 slide mask layer beneath the frame

add brown paper no7 again then apply superstar mask by vix
by going to Layers - Load/save mask from disk and choose the superstar mask...
click apply or ok. depending on your version of PSP

go to Layers -merge group
 slide mask layer beneath the frame 

for Elizabeth's name I used the Monika font size 72
background dark brown no #29221d foreground light flesh colour no #e2cdc8

add main tube then add a drop shadow I used Eye candy5 - impact - perspective shadow
on these settings
 Photobucket


click ok..

with a small paintbrush using a dark colour,
on a ner layer just paint over the the area you want to add sparkles to...
so here is a preview..doesnt look pretty does it...
 Photobucket
but it will in a minute...

now apply the constellation effect TO THIS LAYER on these settings
go to Effects – Plugins  - Alienskin xenofex 2 – constellation, 
 Photobucket
make sure the make selection transparent is selected


and click ok

go to Image - copy merged- and paste into Animation shop as a new animation

back to PSP and click undo,

again go to Effects – Plugins  - Alienskin xenofex 2 – constellation, and click the random button,
go to Image - copy merged - and paste into Animation shop after current frame
 

back to PSP and click undo,

Repeat this process one more time so that you have 3 frames in your animation.
save as a gif and your done.

Thursday, 7 June 2012

Every Girl Sparkles PSP tutorial

Photobucket

Extras available from me Fotki HERE

For this tut I am using the Beautiful artwork of Elizabeth Austin

you can purchase her tubes from UYA. I
used the tube entitled Violet

*scrap kit used was a PTU one - Wild about Purple by me HERE

*however for the experience tagger, im sure you can use another purple scrap kit you already have,
 it wont look exactly the same of course but thats not to say it wouldnt look just as good...* 
 
Template 313 by Missy  HERE
.............................................................
open up template then go to image - resize canvas 650 x 650 pixels,
you can always resize or crop later

add the bg1 from the kit,

open up cluster overlay2, copy and paste above the rectangle layer,

duplicate then go to image - flip then add a drop shadow to both clusters.

open up paper4 from the kit and resize by 600 pixels,

make the layer 'large circle2 the active layer -

 go to selections -  select all - selections float ,
 then copy and paste the paper4 as a new layer go to

selections invert and hit the delete key on the keyboard to delete the excess..

go to selections none

add a drop shadow

repeat this process for the rest of the layers of the template

for the small circle layer I used paper1

I used paper block1 for the large circle for the square layers I used paper3

for the background frame I used paper6

add paper3 to the rectangle layer

add the diamonds to the top layer

add drop shadow to word art

make the bgframe the active layer then go to selections - select all - sleections float
and then copy and paste the tube over the selection,

go to selections invert and hit the delete key to remove the excess...

go to selections none

go to - layers- layer properties to screen then change  the blend mode from normal to screen
if you want to resize your tag or crop now is a good time...

then just add artists copyright  and your name and save your tag.
 font used for my name was Neuropolitical,
size 48Background colour black, foreground colour white, stroke 2


Sunday, 15 April 2012

HEAVEN SENT PSP TAG TUTORIAL

Photobucket
Extras available from me Fotki HERE
For this tut I am using the Beautiful artwork of Elizabeth Austin
you can purchase her tubes from UYA. I
used the tube entitled Fallen Grace


2 masks used were numbers 41 and 453  by Vix HERE
*scrap kit used was a PTU one - Wings of love by me HERE

papers I used paper 2 and 4


*however probably any purple/lilac textured paper would suffice
then you just need a cloud and a glitter sheet again I used the ones in my kit
but if you dont have it and you have other clouds and glitter sheets im sur they would suffice*
.............................................................

open a new canvas 600X600 pixels

floodfill with white

copy and paste paper2 as a new layer
then apply the mask 453
apply vix mask 453 by going to 
Layers - Load/Save mask from disk
and click on apply

go to Layers -merge- merge group

copy and paste paper4as a new layer
then apply the mask 41
apply vix mask 41 by going to 
Layers - Load/Save mask from disk
and click on apply

go to Layers -merge- merge groupnow add your tube  as a new layer twice  and arrange over your masks till happy
now change blend mode to screen on both
by going to layers - properties and and change the blend mode to screen
copy and paste element wol-lights from the kit

copy and paste ct-light  element from the kit

now copy and paste the  mai tube resize 80% using smartsize
 add clouds1  from the kit to the bottom

now open the GLITTER TILE4

with your glitter tile selected in your background fill on the material pallete, and foreground null
write out text using - IMPACT font on SIZE 80
add a drop shadow to the text.
 add your name I used carpenter font backgfround fill white
add artists copyright and save your tag.


Friday, 30 March 2012

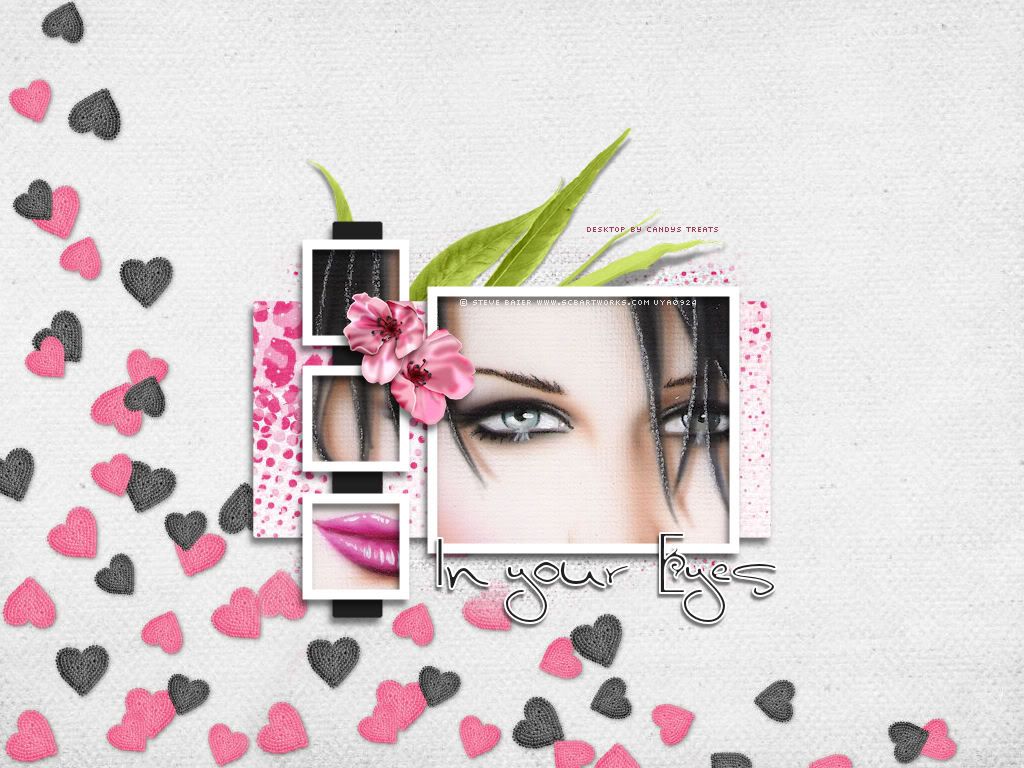
Written in your Eyes wallpaper

Photobucket 

Just made a new desktop for myself, and thought I would share with you...
artwork by Steve BaiEr @ UYA

YOU CAN DOWNLOAD HERE

Friday, 23 March 2012

Man Eater

This tag tutorial was written by me on 23rd March 2012 any resemblance to any other tut is purely coincidental
Photobucket

For this tut I am using the fantastic artwork of Elizabeth Austin
you can purchase her tubes from UYA.
i used the tube entitled Man Eater


Template 110 by Simone (Scrappy bit of fun) from HERE

Animation is a premade one by Patricia -  get it on her blog

Filters used were: Xero and  VM Transmission
....................................................
open template 110, delete the watermark

make the black background layer of the template the active layer  simply by clicking on it
and go to Effects - Filters - VM -Extravaganza - Transmission 
with the following settings
Photobucket
 click ok


open copy of the tube you want to use,
make it greyscale by going to
Adjust - hue and saturation and set both the hue and saturation to 0 (zero)

then click on the slats layer
go to select all - selections invert -
copy and pate the grey scaled tube as a new layer onto the template

then hit the delete key to remove the excess

merge down by going to Layers -  merge down

duplicate this layer and change the blend mode to overlay
do this by going to Layers - Properties change the blend mode from normal to overlay

then merge down again


then go to layers - duplicate 
then go to  Image - mirror
now arrange both  greyscaled slatted images to your liking on either side of the template

add main tube to center, go to Effects - Plugins - Xero-Radience
and use these settings
Photobucket
move white frame to top by clicking on the white frame layer and
go to Layers - move to top


repeat for the black frame
go to Layers - move to top
 then type out the text MANEATER with bank gothic mid font size 72 background fill white


stretch the word width ways so that it stretches across the whole tag
convert to raster and lower the opacity to about 30

i then added my name in white with Dr Carbfred font size 72 also

add your artist copyright
thats the tag itself made
.................................................
this may not be the way you do animation I am a tad cackhanded when it comes to these things....
I can only tell you how i do things.....if you have a better way please use that. ;)

open the premade animation  by patricia in animation shop
you will see it has 57 frames
leave as is for now...
BACK TO PSP
because i placed the animation behind the middle tube
 simply X out the top layers, so the top 2 frames of the template, 
the copyright, your name and the text maneater and middle tube

then copy merged and paste into animation shop as a new animation
 then duplicate this frame 56 times 
and Select All
click the propagate patste button (it looks like 3 sheets of paper)

now click on the premade animation by patricia and go to Select All
and copy and paste into your tag

this should add the premade animation to your tag

BACK TO PSP

unhide the top layers that you hid before and then hide the bottom layers
then go to copy merged and paste as as a new animation into animation shop

then copy and paste the tube etc, and paste into selected frame
(because you have them all selected and the propagate paste button down it should paste into all frames the same)
now slide to the first 10 frames of your animated tag and you will see that the animation does not show behind her head for these 10 or so frames....delete these frames as they are not needed

save your tag  as a gif with a unique name and you are done...

Saturday, 10 March 2012

Written in your Eyes

Photobucket
This tutorial was written by me on 08th March 2012 any resemblance to any other tut is purely coincidental
For this tut I am using the fantastic artwork of Steve Baier
you can purchase his tubes from UYA.
i used the tube entitled Written in your eyes.
 
texture is a paper made by me and is included in my Valentine freebie on my scraps blog, as are the flowers etc you see in this tag...downlaod from .my  scraps blog is HERE 
Mask used was from Weescotslass no 145 her blog is HERE
Templateno 36 by Yvette HERE look under the heading Downloads on the right side.
fonts used were 2 PTU fonts so you may use my 'in your eyes' Word art above
 its  a .png so just right click and save it.

Photobucket


.......................................................
Lets begin by unzipping your supplies, and adding the mask to your mask folder
 
then open the template and delete the watermark layer
 
copy and paste the grey valentine paper  as a new layer , and slide to the bottom layer, but above the white background layer

apply mask by going to Layers - Load/Save mask from disk
WSLmask145


Photobucket 


click load, then go to layers merge group.
 
make the large long dark grey rectangle the active layer by clicking on it and go to selections all, selections float ...with your selection still selected
 open up the pink textured paper, resize using smartsize to 600 pixels copy and paste the paper onto your canvas as a new layer and go to selections invert and with the paper layer selected hit the delete key to remove the excess.. 
go to selections none
you can delete the grey rectangle layer now as you do not need it.

 then select the thin rectangle and and floodfill with colour I used black, add a drop shadow.
then select the 3 small squares on the template by going to select all - selections float , then open up youe tube and paste as a new layer, once you are happy with the position of the tube 
go to selections invert and hit the delete key to remove the excess 
go to selections none

repeat this process again with the tube for the main rectangle with the main image.

then resize leaves by 80% copy and paste as a new layer and slide this layer so its positioned between the mask and the bottom rectangle layer.

resize flowers by 20% add a drop shadow and  position them untill you are happy
add my 'In your eyes' wordart.

crop around your tag for neatness add a drop shadow to any of the rectangle layers if you havent already done so.....


add your name and the artist © information
save your tag with a unique name and your done.
Till next time
Diane x

Tuesday, 20 December 2011

Facebook Timeline cover piccie

Photobucket
click on the image to see the full size...
For this tut I am using the fantastic artwork of Steve Baier
 you can purchase his tubes from upyourart.com
scraps used were by me, Snow is falling here, and christmas word art here
both are on sale right now...

hiya everyone,  Im loving the new timeline layout on facebook
and after seeing my cover photo I have had a few people ask me how I made it...
and a few ask me to make them one, so I thought i would do a tutorial on it....

open up a new canvas  around 850 x 315 pixles..it needs to be pretty big or it seems to distort...

open paper 13 from my snow is falling kit, or a paper of your choice...
now for neatness make sure the paper join is behind the tube so you do not see the join...
copy and paste the christmas tree corner from my snow is falling kit, 
arrange to the top left corner
 add a drop shadow

add tube to the right side , add a drop shadow


open up the WA ' happy new year' and select the word HAPPY
with your selection tool set to rectangle, make a selection around the word
then cut and paste it as a new layer onto your canvas -  add a shadow
add word art 'christmas' with the cluster overlay

add snow sparklies from my snow is falling kit -
and arrange to the left over the christmas tree corner

duplicate and again move to the left side and arrange to your liking

add your copyright

add some text to personalise it to you..
I used Dr Carbfred font for the one above set to size 48

here are a couple more examples
Photobucket

Photobucket 

I hope you found this tutorial helpful xx

Friday, 9 December 2011

Masquerade

Photobucket

For this tut I am using the fantastic artwork of Camilla Drakenborg
the tube is called Masquerade you can purchase her tubes from upyourart.com
 grab a fab bokeh texture from deviant art HERE 
I looked for one that had similar colours as the tube I wanted to use

Open a new canvas 650 x 300

resize texture by 650 width pixels using smartsize as mine was pretty large

copy and paste the texture onto your canvas

copy and paste tube onto the canvas, then change the blend mode by going to Layers - Properties - and change the bend mode from normal screen

lower the opacity to 36%

add another tube i used the same one , resize by 80% using smartsize and arrange to the left side

add a new raster layer

thenusing your selection tool on rectangle and draw out a square then flood fill it with a colour from the tube i used colour code #931558

then go to selection modify - contract by 5
then hit the delete key to remove the excess, so you have a white frame

then selection none

then go to rotate free roate right by 3

then add a drop shadow

then add a new raster layer then floodfill with a colour from the tube i used colour code #931558

floodfill layer the go to select all - then selections - modify - contract by 5 and hot the delete key to delete the excess, so you are left with a border around the edge

then with your pen tool, set to width 5 draw out a straight line horizontally across the canvas convert to raster layer

then with your erase the bit inside the box frame you made

then drag this layer beneath the box frame

add your name i used font windsong set on size 90 pixels all lower case

add your copyright

add a new raster layer

then make a selection with your selection tool set on rectangle at the bottom of your tag, make it to fit where inside the line you drew out across the tag earlier

then floodfill the selection with white and set the blend mode to soft light

move this layer beneath the left tube layer

copy merged  and paste into animation shop

back to PSP

move the white rectangle above the line

copy merged and paste into animation shop after current frame

back to PSP

move up again this time you may find that a part shows  inside the box frame, 
simply erase the part that shows in the frame

copy merged and paste into animation shop after current frame

back to PSP

move up again this time line up the rectangle with the top of the box frame, and again erase anything inside the box frame,

copy merged and paste into animation shop after current frame

back to PSP

move up again this time move the rectangle to the top of the canvas, 
you may notice that the soft light rectangle doesnt reach far enough over now, 
because its above the box frame, so just make another another selection that matches the one you have and floodfill again with white. as the layer is already set to soft light it it should still be transparent

selections none

and again  for neatness erase anything inside the box frame,

copy merged and paste into animation shop after current frame

back to PSP

in animation shop go to select all -  
then animation frame properties - and change the dispaly time to 20 
save your tag with a unique name and you are done

Saturday, 3 December 2011

LUCKY CHARM

Photobucket

TUBE USED: david boller 
you will need a license to use this artist's work from UpYourArt 
 direct link to tube used HERE

You will also need the following plugins:
Alienskin Xenofex 2 & eye candy 5 - impact get a free trial here
plus Animation shop
clover scatter - made by me its below as a PNG just right click and save it
Font used was TOONISH - get it HERE 
..........................................
first save my clover scatter its a .png so just right click and save it...
i MADE it so please dont use it in YOUR tuts, but you may use in any tags you make 
OK, now Open a blank canvas 600 x 600 flood fill with white
(you can always crop later if needed)

if using the same tube as me, resize by 80% using smartsize,

duplicate the tube , make the bottom tube your active layer then go to effects - eyecandy 5 motion trail use the following settings


Photobucket


now you can either duplicate this layer,
which is what i did as i decided i wanted the blur a little darker after the fact..... or you can up the opacity setting to about 50-60 :)
now add the same tube again do not resize it this time
go to image- mirror then go to layers - properties and
change the blend mode from normal to screen
Photobucket 

*optional* add the clover scatter i made as an embellishment.
slide this layer beneath the top tube
make the top tube the active layer, simply by clicking on it
and add a drop shadow to the top tube i used the following settings

Photobucket
click on the 'A' which is your text tool and write the text 'LUCKY CHARM'
using the free TOONISH font
i used a dark grey for the background colour and a green
from the tube for the foreground set the stroke to 2
see settings i used below
Photobucket
add a drop shadow same as before
before you start to animate its a good idea to add your name and copyright so that it stays in the same place and doesnt move around while trying to animate

now with your magic wand tool, i used the settings below
Photobucket
hold your shift button down on your keyboard and select inside each letter

once all are selected apply the constellation plug in by going to
Effect- Plugins - Alien skin Xenofex2 - constellation with the following settings
Photobucket
click ok
then go to Selections none - copy merge and paste into Animation shop as a new frame

back to PSP
click undo button twice, and go to Effect- Plugins - Alien skin Xenofex2 - constellation with the the same settings but this time hit the random button.
then go to Selections none
then copy merged and paste into Animation shop after current frame

back to PSP
click undo twice,
go to Effect- Plugins - Alien skin Xenofex2 - constellation with the the same settings, hit the random button one last time.
go to Selections none- copy merged and paste into Animation shop after current frame one last time
save as a gif and you are done.
.............................

Midnight Fae

Photobucket

This scrap tag tutorial was written by me Diane Knight
on 10th Feb 2009 any resemblance to any other tut is purely coincidental

For this tut I am using the fantastic artwork of Suzan Justice (Mckivergan)
the tube is called night song , you can purchase her tubes from upyourart.com although my licence is from when she was at AMI..now closed
for this tutorial you may need a basic knowledge of PSP
you will need PSP,
and this stunning Scrap kit by Pimp'd Scraps called Mid Summer Night
which you can purchase HERE and her blog is HERE
 .....................................................
open up canvas 650 x600 you can always crop later..i like room to work..

open up frame3 from the kit resize by 70% , then duplicate and rotate right by 75
slide this frame to the bottom.

make a selection inside 1 of the frames go to selection modify expand by 5

then copy and pate paper27 from the kit as a new layer. now go to selection invert and hit the delete key to remove the excess... repeat this for both frames. and slide the papers below the each frame.

copy and paste the star cluster and slide this layer to the bottom, so its underneath the frames and papers. arrange to the left side.

flower3 rotate clockwise 90 resize by 70%, slide this layer between the 2 frames,so that its below the top frame but above the bottom one.

then duplicate the flower3 and then flip it so that its arranged to the bottom of the frames,

add flower2 resize by 60% add this to the top left of the top frame, so that it looks like its draping down the frame

copy and paste flower 7

resize by 60% and arrange to the top left of the canvas, duplicate and arrange slightly lower down ... do the same for flower8 , then duplicate them both and arrange a couple more to the right side...see my tag for placement.

add a drop shadow to each flower, I used vertical -1 horizontal -1 opacity 57 blur 5

flower13 resize by 80% and arange at the bottom of the frames...slide this layer to the top

copy and paste the greensribbon from the kit and resize by 70% and arrange to the bottom of the canvas.

now find your top frame layer and select inside the frame, go to sleections modify expand by 5

then copy and paste an image of choice .. and go to selctions invert and hit delete to remove the excess..slide this layer underneath the top frame.

add your name and © and save as either a jpg or .png

I hope you enjoyed this tutorial xx

Sunday, 6 November 2011

TA-Naughty tutorial

Art by Nicholas Garton, you need a licence to use this artist's work available from UYA HERE
Template by beth09 from the creative misfits HERE  13th download down.
Torn Affection Freebie by me from my scraps blog HERE
Naughty Word art by Deb HERE 
VixPsp BigMask 018 HERE
Font used for my name was Neuropolitical its Free HERE
.........................................................
open up template called - creative misfits creations taggers template 2 beth 09
delete the watermark layer
look in your layers pallette and find the layer called 1 go to layers -  merge down
then continue to merge down 3 more times untill all 4 long panels at the back are merged

then go to Selections - select all -
open up torn affection paper2-  paste as a new layer then make sure the paper layer is the
active layer and hit the delete key to remove the excess.

Selections none

find the layer called - lg white circle - select all - select float - selections invert

open up block pink paper and paste as a new layer - then
make sure the paper layer is the active layer and hit the delete key to remove the excess.

while this selection is still active - copy and paste as a new layer a tube and hit the delete
key to remove the excess. ( i used a close up of her face)

selections none

repeat this process for the sm white circle layer
( i used the background image layer from this particular tube)

remember to go to selections none when done

do the same for the Circle frames with papers from the kit

next open up the pink flower from the kit, resize by 20%  repeat for the light and dark brown flowers. but resize those by 15% using smartsize

copy and paste each  as a new layer and add a drop shadow

delete the brackets layer from the template

copy and paste bracket3 from the kit as a new layer, slide to the bottom layer
then with your selection tool -  select anything below the bottom line 
and hit the delete key to remove the excess add a drop shadow.

open up stitched line 2 from the kit, resize by 30% add a drop shadow and arrange to the right
 duplicate and arrange near the left..

delete the words from the template - feeling naughty,
instead add Naughty word art.. link is above

open up paper1  and arrange to the bottom 
next apply the vix mask018
by going to Load - saved mask using these settings
Photobucket

go to  merge group

Font I used for my name was Neuropolitical
select your background and foreground fills
Photobucket
background fill colour html code #e3699c
forground fill white stroke 2
font size 48

Photobucket

convert your vector layer to a raster layer, add a drop shadow
and save your tag as a unique file name and as a .png

thanks for trying my tut...
Diane x

Thursday, 20 October 2011

Purple Rain tut 2


here is my latest tutorial
things you will need, Template by missy 405 HERE
Freebie scrap kit by me called Purple Rain HERE
Free Sevilla Decor Font HERE
Masks by WeeScotslass 181 - 240 HERE
Tube by Christian Gonzalez from UpYourArt HERE

Download supplies and unzip them all, add your masks to your masks folder..
Open tube of choice, if using the same one as I have, resize top main tube by 70% slide this layer beneath the black square layer add a drop shadow

I used the following settings
Photobucket
add tube againthe select the black square with the magic wand tool
then copy and paste tube and arrange it over the selection till happy,

now go to selection - invert and hit delete key to remove the excess.

open paper 3 then select the large light pink rectangle
go to selection - select all - float
then resize paper by 70% then copy and paste as a new layer,

  go to selection invert - and make sure your paper layer is selceted
then hit the delete key to remove the excess

 go to selections none

repeat this process for all the layers of the template, with papers of your own choosing.

resize bow from kit - by 30% add same shadow

next, open up glitter doodle2 resize by 70% add
 shadow then slide beneath the layer named rounded rectangle2

add drop shadow

 copy and paste flower4 from the kit, resize by 70% add shadow
then slide underneath the doodle layer you just placed.

add ribbons 1 and 2 from the kit resize by 70%
arrange to the bottom of the tag.
add a drop shadow

open up clip resize by 50%
add shadow

open up heart swirl from kit, resize by 50%
copy and paste as a new layer slide beneath the black frame layer,

duplicate then slide the duplicate to the top layer

add a drop shadow then select the erasor tool with the following settings
Photobucket
and erase the top point of the heart swirl so that it looks like mine...

open paper5 , resize by 70% then apply the following mask to the paper,
Photobucket
 go to copy merged and paste as a new layer onto your canvas,
slide this layer to the bottom.

open one of the glitter fill's from the kit, and select this
as your pattern in your material pallette as your background fill

then with a font of choice type your name
I used the font Sevilla Decor set on size 72
add a drop shadow.

add your copyright and save your tag x

Wednesday, 11 May 2011

Drive me Crazy - free scraps tag & tut

Photobucket

SUPPLIES NEEDED:
..........................................................
free cluster frm Polkadot scraps from her blog HERE
1 nice script font i used Carpenter its a PTU font
1 other font I used Noir-et-blanc get it free HERE
1 fab image, I used an Image by Shawn Palek
you can purchase his art from UYA here

open up image of choice - if using the sae image as me, - resize by 80% using smartsize

now add a border  - 4
by going to image- add border  chose the colour white
Photobucket
click ok
add a drop shadow ,
by going to effects-3d effects- drop shadow
Photobucket
 used these settings

copy and paste the frame as a new layer on to your canvas

add the same shadow as before to the cluster frame

now choose the text tool and add the word Drive
first choose the Noir font background black foreground white with these settings
Photobucket

convert to raster layer 
then add the same drop shadow as before
now select a nice script font, I used carpenter , background white foreground null
 write the words 'me crazy'
using these settings

Photobucket
arrange to your liking, then lasty add the word 'you' with the same script font add a shadow,
place to your liking 

add your copyright and your name with the Noir font ...
and save your tag....


Saturday, 30 April 2011

Twisted Fairytale scrap tag tutorial

Photobucket
SUPPLIES NEEDED
................................................
scrap kit by me Candys Treats  - Twisted Fairytale available from
Stargazers, Twilight Scraps or Digital Chaos
artwork used is by Camilla Drakenborg you can purchase her art from UYA
Masks 148 & 365  used by Vixpsp

ok lets begin
...............................................
open a new canvas 600 pixels and floodfill with white

open up paper23 resize by 600 pixels using smartsize

now apply the mask by going to Layers- load/save mask
Load from disk , a pop up will appear
see below for screenshot of my settings

Photobucket 
click apply then merge group by going to Layers -  Merge group
then duplicate this layer....
now apply a second mask to the duplicated mask layer,
 by going to Layers- load/save mask
Load from disk , a pop up will appear
see below for screenshot of my settings
Photobucket


add cloud3 from the kit twice along the bottom, one to the left and 1 to the right
where the bottom of the mask is....


if using the same artwork as me, this tube comes with a tube and image layer, 
open up the Image layer
crop it a little mine is roughly 370 x 545 pixels, then add a white border by going to
Image -  add border 5
make sure the colour is white
 Photobucket

click ok or apply depending on your version of PSP.

then go to image - resize using smartsize by 70%
then copy and paste as a new layer onto your canvas,
then go to image rotate  - free rotate right by 5

duplicate image then
go to image - mirror the change properties to screen on both layers


add twisted frame7 resize by 80% add a shadow 
arrange to the right side

add twisted green cluster resize by 70% add a shadow
add frame5 from the kit add a shadow and arrange to the left side


add twisted fairytale flowers from the kit and slide beneath the frames and image layers
so they are ontop of your mask layer, arrange to the right side

you will notice that because of the blend mode on the images you will just make out the shapes of the flowers through the images, to remove this,  use the eraser tool on a soft edge setting see below for screenshot

Photobucket
then duplicate layer and go to image mirror and arrange flowers to the other side

now add the sparkly fairydust from the kit, duplicate it 
this just makes the sparkles brighter

add ribbon2 add a shadow and slide underneath frames but on top of the images

add word art 'my twisted fairytale'
add a few individual flowers,
i resized mine by 20% add dotted them around till i was happy with placement
add copyright and your name and save your tag.

I hope you enjoyed this tutorial
hugz diane x

Saturday, 16 April 2011

BOX & WEAVE - No Scraps tut

here is another simple no scraps or templates tutorial,
I hope you enjoy it... 


Photobucket
This tutorial is a pretty simple tag tutorial using plugins and shapes in psp ....written by me on 13th April 2011 any resemblance to any other tut is purely coincidental.
For this tut I am using the fantastic artwork of Dean Lee Norton
you can purchase his tubes from UYA 
 I used the tube entitled Rainbow Bright
plugins used: Toadies Weaver
font used : JaneAusten
...........................................................
Open a 600 x 600 canvas & floodfill white.
if using the same tube, resize using smartsize by 80%
duplicate tube layer
then make sure your material pallette foreground and background are both set to white
ok now, go to Effects - 3d effects - plugins - toadies - weaver
with these settings
Photobucket

add a drop shadow to your top tube layer,
I used the following settings

Photobucket

now add a new raster layer and choose your shape tool, select the square shape, see below
Photobucket

make sure your material pallette - background black - foreground null
and draw out a small square on your canvas
convert layer to raster layer
then go to selections all - selections float - selections - modify - contract by 6
then hit the delete key on your keyboard,
you shoud be left with a small black box frame ..duplicate the box frame 3 times so you now have 4 boxes,
arrange them in a straight line then go to layers - merge down 3 times
so all the boxes are on the same layer then slide this layer beneath the tube layer
next choose the magic wand tool and click inside the first box
go to selections modify expand by 2
add image of choice as a new layer, I used different parts of the same tube in each box , when happy with your selection, go to selections invert and hit delete key to remove the excess, repeat this process for all boxes....

make the top tube layer active simply by clicking on it, duplicate it then change the properties from normal to soft light

add your name and copyright....
for my name I used JaneAusten font using these settings
Photobucket
material pallette set as follows:
Background colour set to Black foreground set to pink

hugz diane x