*old tut moved over from old site*
and im not gonna lie I LOVE to add sparkle to my tags!
and im not gonna lie I LOVE to add sparkle to my tags!
This tutorial was written by me Diane Knight on 10 March 2009 any resemblance to any other tut is purely coincidental
For this tut I am using the fantastic artwork of KEITH GARVEY
you can purchase his tubes from PTE .
For this tut I am using the fantastic artwork of KEITH GARVEY
you can purchase his tubes from PTE .
for this tutorial you may need a basic knowledge of PSP
you will need PSP, and animation shop
for the sparkle you will need : Alien Skin Xenofex 2 Plugin get it HERE
and this stunning Scrap kit called Sparkalicious by Clarey which you can purchase HERE
her blog is HERE
........................................................................
open a new canvas 500 x 500
floodfill with white or as i did with a color from the kit..
colour used was HTML #b6a8ac
OPEN UP THE SPARKLE GLITTER BORDER from the kit,
resize to 500 pixels, copy and paste onto your canvas.
select your magic wand tool, use these settings...
and click inside the border, then go to selections - modify expand by 5,
now add a new raster layer then open up the black paper ( paper1) from the kit and copy into selection. slide the paper layer below the border.
add some sparkles from the kit, i used the star cluster, but they are all fab..
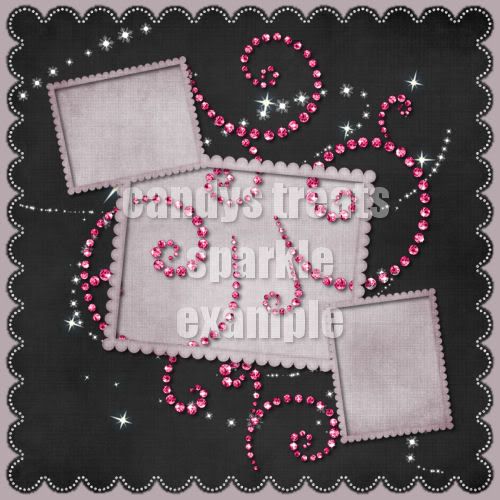
copy and paste the pink diamondSwirl onto your canvas, arrange to the center, mine overlapped the top so i just erased the very top little swirl.
add a drop shadow i used horizontal 2 vertical 2 opacity 63 blur 5
copy and paste the triple frame onto your canvas, then resize by 70%
click inside the frames while holding down the shift key to make sure all 3 are selected at the same time. once they are all selected,
go to selections modify expand by 2
then add a new layer and copy and paste paper5 into selection. and slide underneath the frame. now add a drop shadow to the frame.
then slide the pink swirl between the frame and the paper you just added..
you should have something that looks like this....
next you can add your name to the top right hand corner font i used was Terminator2 avaialable HERE FREE
settings for the font were...
background fill was the pink from the kit html colour code.#9f2d56
the forground fill I used the same as my background fill html colour code #b6a8ac
i used all lower case letters...as caps and lower case look different on this font.
add a drop shadow.
the forground fill I used the same as my background fill html colour code #b6a8ac
i used all lower case letters...as caps and lower case look different on this font.
add a drop shadow.
now add the sheer pink ribbon for the kit, resize by 70% and slide underneath the frame and background for the frame. add a drop shadow..
add the curled ribbon resize by 80% and add a drop shadow, arrange to the bottom of the canvas. add some flowers and buttons of choice, i resized mine by 50% and added a drop shadow to each.
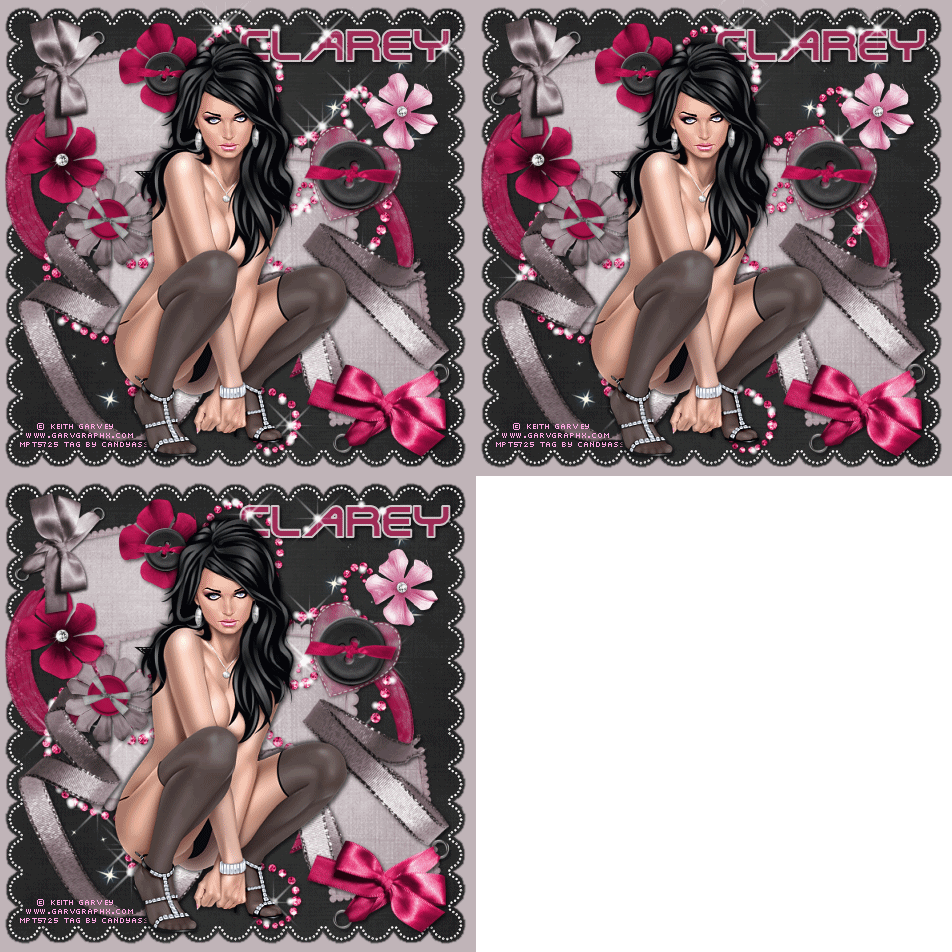
see mine for placement till you have soemthing like this...
add the curled ribbon resize by 80% and add a drop shadow, arrange to the bottom of the canvas. add some flowers and buttons of choice, i resized mine by 50% and added a drop shadow to each.
see mine for placement till you have soemthing like this...

add the stitched heart and resize by 50% rotate right by 25 add a button resize by 70%
now add an eyeletbow resize by 70% and rotate right by 25% add to the top left of the tag..
ow add an eyeletbow resize by 50% and rotate right by 140 add to the bottom right of the tag..
you now should have something like this...

add the tube of choice, resize if neccasary and add the artists ©
now find the Pink swirl layer and add the constellation filter
by going to Effects - plugins - alien skin xenoffex2 - constellation
using the following settings..
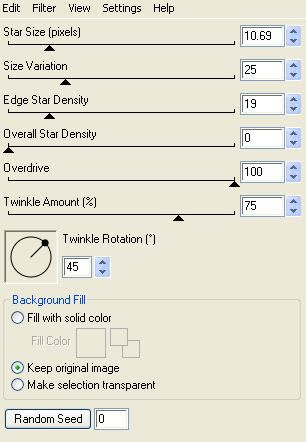
click ok to apply the effect
now find your name layer and add the same filter...
go to Edit - copy merged and paste into animation shop...
and click the undo button till the sparkle is removed from your name and the pink swirl.
THEN go to Effects - plugins - alien skin xenoffex2 - constellation using the SAME SETTINGS AS BEFORE but this time click on the random seed button....
copy merged and paste into animation shop AFTER CURRENT FRAME.
back to PSP
again, click the undo button till the sparkle is removed from your name and the pink swirl.
THEN go to Effects - plugins - alien skin xenoffex2 - constellation using the SAME SETTINGS AS BEFORE click on the random seed button once more....
copy merged and paste into animation shop AFTER CURRENT FRAME.
now slow your animation down a little by going to
edit- Select all then go to animation - frame properties and change the display time to 20
view your animation, if you are happy save it as a gif and your are done
hope you enjoyed my tutorial
Diane xxx



No comments:
Post a Comment