*old tut moved from my old tut site*
This animated tag tutorial was written by me Diane Knight on 7TH JULY 2009 any resemblance to any other tut is purely coincidental
This is a very simple tut using free suplies....yay!!
For this tut I am using fantastic free tubes from Lisa at Sophiticated scraps
both tubes are availale free from her blog HERE
for this tutorial you may need a basic knowledge of PSPboth tubes are availale free from her blog HERE
and a filter called - Filters Unlmited 2 - Audio wave
font used was add your name with the font pulse sans virgin - also free HERE
............................................................
open a new canvas 500 x 600
floodfill with white,
save this button i made to your computer..
its a .png so just right click and save it

then add a drop shadow i used horizontal 5 vertical 5 opacity 37 blur 5
duplicate it and arrange alongside the other to the right..
if you so wish you can now add your name using the Pulse font, i used font size 36 colour red.
also add your copyright for the tube you used.
using the preset shape button, draw out a rectangle for the animation effect, foreground null, background red
convert to raster layer
arrange underneath the 2 buttons
click inside it, with your magic wand tool
make sure the material pallette is background colour red and forgeound colour white.
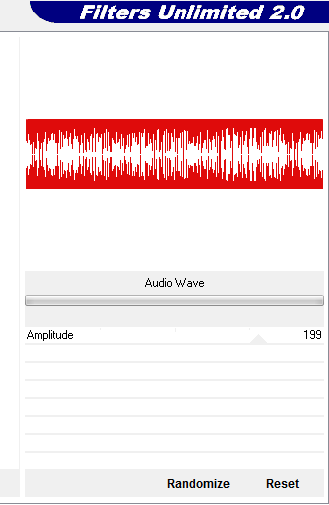
now apply the filter / plugin Filters Unlmited 2 - using the following settings on audio wave.
copy MERGED and paste into animation shop as a new animation
back to PSP...
click the undo button...
now apply the filter / plugin again this time change the number from 199 to 205
copy MERGED and paste into animation shop after current frame
back to PSP...
back to PSP...
click the undo button...
now apply the filter / plugin again this time change the number from 199 to 205
copy MERGED and paste into animation shop after current frame
back to PSP...
click the undo button...
now apply the filter / plugin again this time change the number from 205 to 215
copy MERGED and paste into animation shop after current frame
save as a gif and your done
if using the tube below, then like me, when applying the filter,
adjust the material pallette from red and white to black and red.
(the foreground colour will be the audio effect.)






No comments:
Post a Comment