

TUBE USED: david boller
you will need a license to use this artist's work from UpYourArt
direct link to tube used HERE
You will also need the following plugins:
Alienskin Xenofex 2 & eye candy 5 - impact get a free trial here
plus Animation shop
clover scatter - made by me its below as a PNG just right click and save it
Font used was TOONISH - get it HERE
Font used was TOONISH - get it HERE
..........................................
first save my clover scatter its a .png so just right click and save it...
i MADE it so please dont use it in YOUR tuts, but you may use in any tags you make 
OK, now Open a blank canvas 600 x 600 flood fill with white
(you can always crop later if needed)
if using the same tube as me, resize by 80% using smartsize,
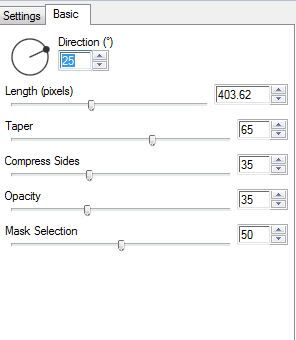
duplicate the tube , make the bottom tube your active layer then go to effects - eyecandy 5 motion trail use the following settings
(you can always crop later if needed)
if using the same tube as me, resize by 80% using smartsize,
duplicate the tube , make the bottom tube your active layer then go to effects - eyecandy 5 motion trail use the following settings

now you can either duplicate this layer,
which is what i did as i decided i wanted the blur a little darker after the fact..... or you can up the opacity setting to about 50-60 :)
now add the same tube again do not resize it this time
go to image- mirror then go to layers - properties and
change the blend mode from normal to screen

slide this layer beneath the top tube
make the top tube the active layer, simply by clicking on it
and add a drop shadow to the top tube i used the following settings

click on the 'A' which is your text tool and write the text 'LUCKY CHARM'
using the free TOONISH font
i used a dark grey for the background colour and a green
from the tube for the foreground set the stroke to 2
see settings i used below

add a drop shadow same as before
i used a dark grey for the background colour and a green
from the tube for the foreground set the stroke to 2
see settings i used below

add a drop shadow same as before
before you start to animate its a good idea to add your name and copyright so that it stays in the same place and doesnt move around while trying to animate
now with your magic wand tool, i used the settings below

hold your shift button down on your keyboard and select inside each letter
now with your magic wand tool, i used the settings below

hold your shift button down on your keyboard and select inside each letter
once all are selected apply the constellation plug in by going to
Effect- Plugins - Alien skin Xenofex2 - constellation with the following settings

click ok
then go to Selections none - copy merge and paste into Animation shop as a new frame
back to PSP
click undo button twice, and go to Effect- Plugins - Alien skin Xenofex2 - constellation with the the same settings but this time hit the random button.
then go to Selections none then copy merged and paste into Animation shop after current frame
back to PSP
click undo twice,
go to Effect- Plugins - Alien skin Xenofex2 - constellation with the the same settings, hit the random button one last time.
go to Selections none- copy merged and paste into Animation shop after current frame one last time
save as a gif and you are done.
............................. 


No comments:
Post a Comment