
This tag tutorial was written by me Diane Knight on 21/03/07 any resemblance to any other tut is purely coincidental
For this tut I am using the fantastic artwork of Dholl
this is not a general free to use artist, you need permission from this artist to use their artwork, but you can use any heart image/tube you have permission for...
For this tut I am using the fantastic artwork of Dholl
this is not a general free to use artist, you need permission from this artist to use their artwork, but you can use any heart image/tube you have permission for...
My supplies HERE, tube is not supplied because its not a general free to use artwork, sorry.
However I believe I got my tube from the Zone Group HERE, they have permission as well as tubes
...........................................................
1st you need to UNZIP the supplies and import your brushes into PSP
If you want to know how to do this go HERE
Once your brushes are showing in PSP
open the rest of the supplies in PSP
*For beginners I have included the splattered background in the supplies Just copy and paste your splats template as a new layer onto your new and work from there and move onto step 3*
Open a new canvas in PSP 600 x 500 and flood fill with White
Go to Layers – new raster layer
STEP TWO
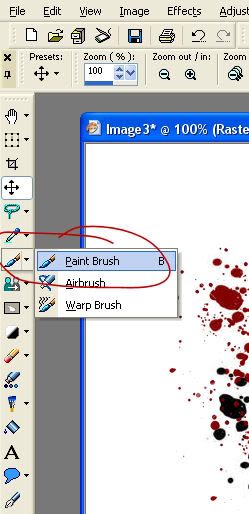
Click on your paintbrush tool see my screenshot if your not sure where it is.
Now just click on your new canvas and add the splat brushes -
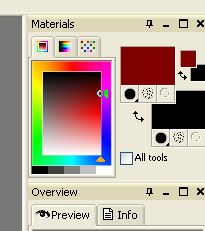
left click for the red colour and right click for the black.
left click for the red colour and right click for the black.
STEP THREE
Now take your heart tube and copy and paste it onto your splattered canvas.
Now take your heart tube and copy and paste it onto your splattered canvas.
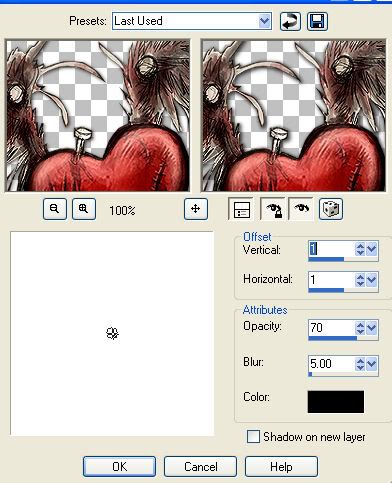
Add a drop shadow using the settings below:
Now add your name or saying with a font of your choice and add your © information.
I used ephasis - font size 72 - colour black.
Next, click on your freehand selection tool it looks like a little lassoo
Trace an outline very carefully around the red part of the heart by left clicking around it and right clicking to join the ends… see below:
I used ephasis - font size 72 - colour black.
Next, click on your freehand selection tool it looks like a little lassoo
Trace an outline very carefully around the red part of the heart by left clicking around it and right clicking to join the ends… see below:
Leaving the area selected make 2 more copies of your heart, by pressing shift and D then on one of your copied hearts, go to
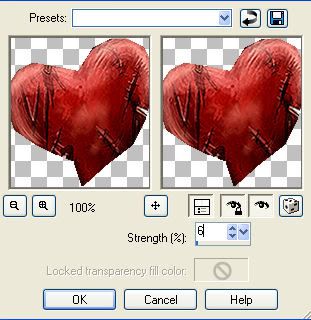
effects - distortion effects – punch
and use the settings below:
effects - distortion effects – punch
and use the settings below:
Then click on the 3rd copy of your heart and do the same
using 12 instead of 6 in your settings.
*I am using PSP 9 but in other versions, you may need to use
effects- geometric effects-punch instead*
click on each of your pictures individually and go to
selections - select none
and then selections - merge all (flatten)
on each frame
ok with me so far? Hope so …
now you need to copy and paste your 3 frames into animation shop
copy and paste frame 1 *the one we didn’t add any effect to* into Animation shop
now copy and paste frame 2 *the one we added the effect with settings 6* after current frame
and copy and paste the final frame after current frame too.
You should have 3 frames in animation shop now
Crop if necessary.
Now save your animation as a gif and your done, I hope you enjoyed it xx




No comments:
Post a Comment