This animated tag tutorial was written by me Diane Knight on 30th Jan 2009
any resemblance to any other tut is purely coincidental
the MASK is made by Becky but for your convenience is included in Supplies HERE
along with the word 'LOVE'
artwork of Keith Garvey you will need to buy a licence to use this artists work at PTE
You will also need PSP, I use PSP9 , ANIMATION SHOP plus the following plugins:
to add the animated sparkle
free trials are available at the links below...
Alienskin Xenofex 2
Alienskin Xenofex 2
..............................................................
unzip supplies place the mask in your masks folder
.....................................................................
Then open up the Word LOVE in supplies in PSP
open up a canvas 700x500 pixels Fllodfill with white...
add a new ratsre layer and Floodfill your canvas with the colour #ab7580 then apply the mask by going to
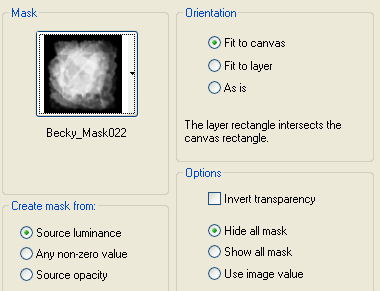
Layers- Load/save mask - Load mask from disk..a pop up will appear look for the mask called
Becky_Mask022 and use the settings below...
go to Layers - Merge Group
copy and paste the word Love supplied onto your canvas...see my tag for postioning..
we are now going to add a perpective shadow using a filter....
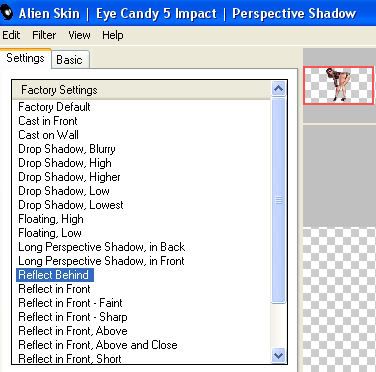
go to Effects - plugins - Alien skin - eye candy 5 - Impact - perspective shadow....
using these settings....
using these settings....
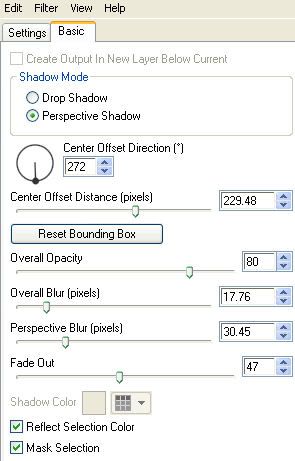
now click on the Basic tab and make sure your settings are the same as below..
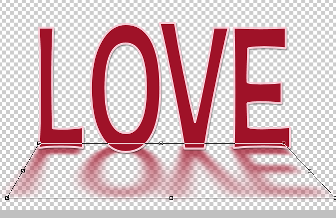
you may find that the reflection doesnt touch the bottom of the word, seee below for how it should look...
if it doesnt, do not worry just adjust the nodes in the viewing window till you are happy with the alignement.
add the artist ©
now add a tube of choice, I used the artwork of keith Garvey....
copy and paste the tube onto your canvas, duplicate it and slide 1 tube underneath the word LOVE.
add a drop shadow to the bottom tube..
Now select yor eraser tool, it looks like a pencil with a rubber on the end. and using these settings
making sure your top tube is the active layer..
carefully erase her legs where the right half of the letter 'O' and the left part of the letter 'V'
it doesnt have to be super neat as the bottom tube will fill in the blanks ...
SEE MY TAG ABOVE IF UNSURE...
add your name and © I used pixellette for the © and A&S Snapper font for my name...Now to add the sparkle the the text.
select your magic wand tool with the following settings below
then make sure the word LOVE is the active layer and click inside each letter holding the shift key down at the same time so that all letters are selected at the same time..
see below...
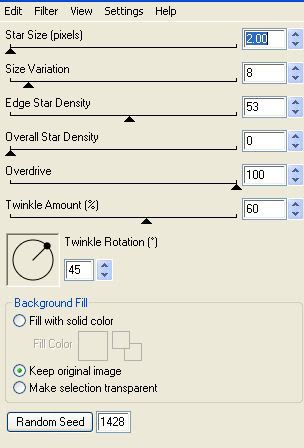
go to Effects plugins - Alien skin Xenofex 2 - Constellation
with these settings -
click ok to apply the effect
back to PSP
CLICK UNDO
THEN go to Effects - plugins - alien skin xenoffex2 - constellation using the SAME SETTINGS AS BEFORE but this time click on the random seed button....copy merged and paste into animation shop AFTER CURRENT FRAME.
back to PSP
CLICK UNDO
copy merged and paste into animation shop AFTER CURRENT FRAME.
Then just save as a gif and your are done!..thanks for trying my tutorial







No comments:
Post a Comment