*old tut moved over from tut site*
For this tut I am using the fantastic FREE stock image from Morgue file HERE
everything is free so no scraps or ptu artists ,
you will not even need any plugins, just a version of PSP, i am using PSP9
Font used was toonish get it free HERE
open up an image of choice, then resize if needed using smart size...
i resized mine so that the width is 500 pixels
now duplicate your image , then greyscale your bottom image
by going to adjust hue and saturation
and set both the sliders to '0'
then click on the top layer to activate this layer
use the Freehand or Lasso tool
on this top layer to get rid of everything you dont want in colour.
settings:
Selection type = Point to Point
way to select)
Feather = 0
Antialias = unchecked
Sample merged = unchecked
Selection type = Point to Point
way to select)
Feather = 0
Antialias = unchecked
Sample merged = unchecked
see below
to finish off the tag i did the following
add a new raster layer
now click on your selections tool
draw out a rectangle selection, along the entire bottom part of the tag, then set your properties to soft light, do this by
going to Layers - properties, and change the drop down menu from normal to soft light.
then we are going to add a texture to this selection
by going to effects - 3d effects - using the following settings.
add a new raster layer, floodfill with orange,
select all - selections modify - contract by 3
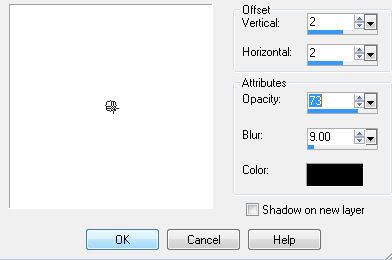
add drop shadow I used the following settings
now add your name, i used the Toonish font on these settings
kerning set to 25 and anti alias set to sharp.
setting the anti alias to sharp gives you a nice clear sharp text...
convert to layer to raster then add the same drop shadow as before.add the © and save as a png or jpg
I hope you enjoyed this tutorial xx


No comments:
Post a Comment