
*old tutorial moved from my old site*

For this tut I am using the fantastic and free artwork of Zindy Nielson....
you need a licence to use her art.
You can purchase tubes from her shop HERE
You can purchase tubes from her shop HERE
for this tutorial you may need a basic knowledge of PSP
Font used was windsong get it HERE
and this twilight themed Scrap kit called Bella's Lullaby by Pimpd Scraps
.....................................................
open a new canvas 600 X 600
I like room to work, you can always reszie or crop later...
open up the silver circle frame from the kit, resize using smartsize by 55%
copy and paste onto the canvas..
click inside the frame with the magic wand tool.
and go to selections - modify - expand by 3
then copy and paste the blue paper as a new layer
then copy and paste the blue paper as a new layer
go to selections invert and hit delete to remove the excess...
while your selection is still active open up the zindy tube and resize by 80%
then copy and paste as a new layer..
arrange it in the frame then hit the delete key to remove the excess
then copy and paste as a new layer..
arrange it in the frame then hit the delete key to remove the excess
now go to seletions none.
now slide the frame to the top layer...if unsure how to do this..
click on the frame layer then go to Layers - arrange- bring to top.
click on the frame layer then go to Layers - arrange- bring to top.
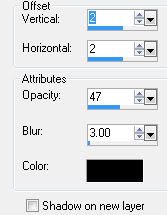
add a drop shadow..
i used the following

now open bella's lullaby music sheet..
resize by 60% then copy and paste it onto your canvas
then go to image - rotate- free rotate left by 10

then go to Layers - arrange- send to bottom
now duplicate the sheet , go to image - mirror...arrange to liking..
add the blue gitter music notes..
add a drop shadow same as before but this time the opacity at 35
now copy and paste the swirl from the kit go to image - mirror
add a drop shadow as before
opacity at 47
and with the eraser tool, delete the overhang on the left side
just make sure your eraser settings are
hardness density and opacity are all set to 100 to make certain
you leave no trace when you erase it
now add flower1 from the kit...then go to Layers - arrange - bring to top.
go to image mirror then resize by 50%
add a drop shadow as before but blur set at 5
duplicate it then go to image mirror and resize by 80%
open up the white rose from the kit, resize using smartsize by 30%
then free rotate left by 35
add a drop shadow..
then duplicate this and mirror it.
rotate this one again right by 20%
add bow3 from the kit resize by 35% add a drop shadow....
make sure you are happy with flower arangement behind the bow...
copy and paste the clouds from the kit resize by 60% and arrange to the right...
now add your name using the following settings with the windsong font

crop around your tag to remove the excess and your tag


No comments:
Post a Comment