

This tag tutorial was written by me Diane Knight on 16 JAN 2008
any resemblance to any other tut is purely coincidental
For this tut I am using the fantastic artwork of Debora Aguelo
you will need her permission to use her artwork, or use an image of your choice
For this tut you will need PSP
free Scrap supplies and Mask made by me HERE
and some flowers of choice
...........................................................................
open up open a new canvas 500 x 500 Pixels
flooodfill with white
add a new raster layer and floodfill with a colour of your choice ..i used #a98fad
now go to Layers- Load/save mask - Load mask from disk..a pop up will apppear look for my mask called CandyassTornpaperMask
and use the settings below.

go to - Layers merge Group
now open an image you would like to use for your tag
I resized mine to 310 x 333 pixels now add a white border by going to
Image - add border
and change the pixel value to 3 and the colour to white.
copy and paste that image onto your canvas
now open an image you would like to use for your tag
I resized mine to 310 x 333 pixels now add a white border by going to
Image - add border
and change the pixel value to 3 and the colour to white.
copy and paste that image onto your canvas
now open up the supplies i gave you
in there there is a frame
copy and paste that as a new layer onto your canvas.
copy and paste that as a new layer onto your canvas.
resize it by going to Image - Resize - and resize by 80% (smartsize)
to change it from landscape to portrait
go to Image- rotate - free rotate and use the following settings
go to Image- rotate - free rotate and use the following settings

now go to Image - Rotate and use the following settings

now add a drop shadow by going to Effects - 3d efects- drop shadow
with the following settings.

copy and paste as a new layer onto your canvas the little name tag from the supplies
resize by 80% and rotate as before but change the value to 18 then place where you think it looks good.
copy and paste as a new layer the bow supplied and resize that by 40% place where you would like it.
copy and paste the heart element supplied then go layers - dupicate ..so you get 2 then go to Image - mirror
you should have one heart on each side of the canvas.
slide one under the frame layer and slide the other underneath the image layer.
so far you should have something that looks like this...

now add the silver swirl element supplied..place over the frame
to get the cut out effect on the swirl I now select your freehand selection tool
see screen shot below..
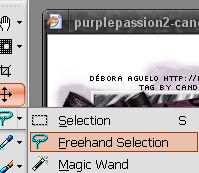

and trace round the corner of the frame then hit the delete key.
now add a flower of your choice i used white ones and coloured them adjusting the hue and saturation to match the tag.
*Adjust - Hue and saturation - Colourise*
I used the following settings

add the artists copyright and your name..font for my name I used was Voluta Script Pro font 110
thanks for trying my tut..
Diane xx


No comments:
Post a Comment