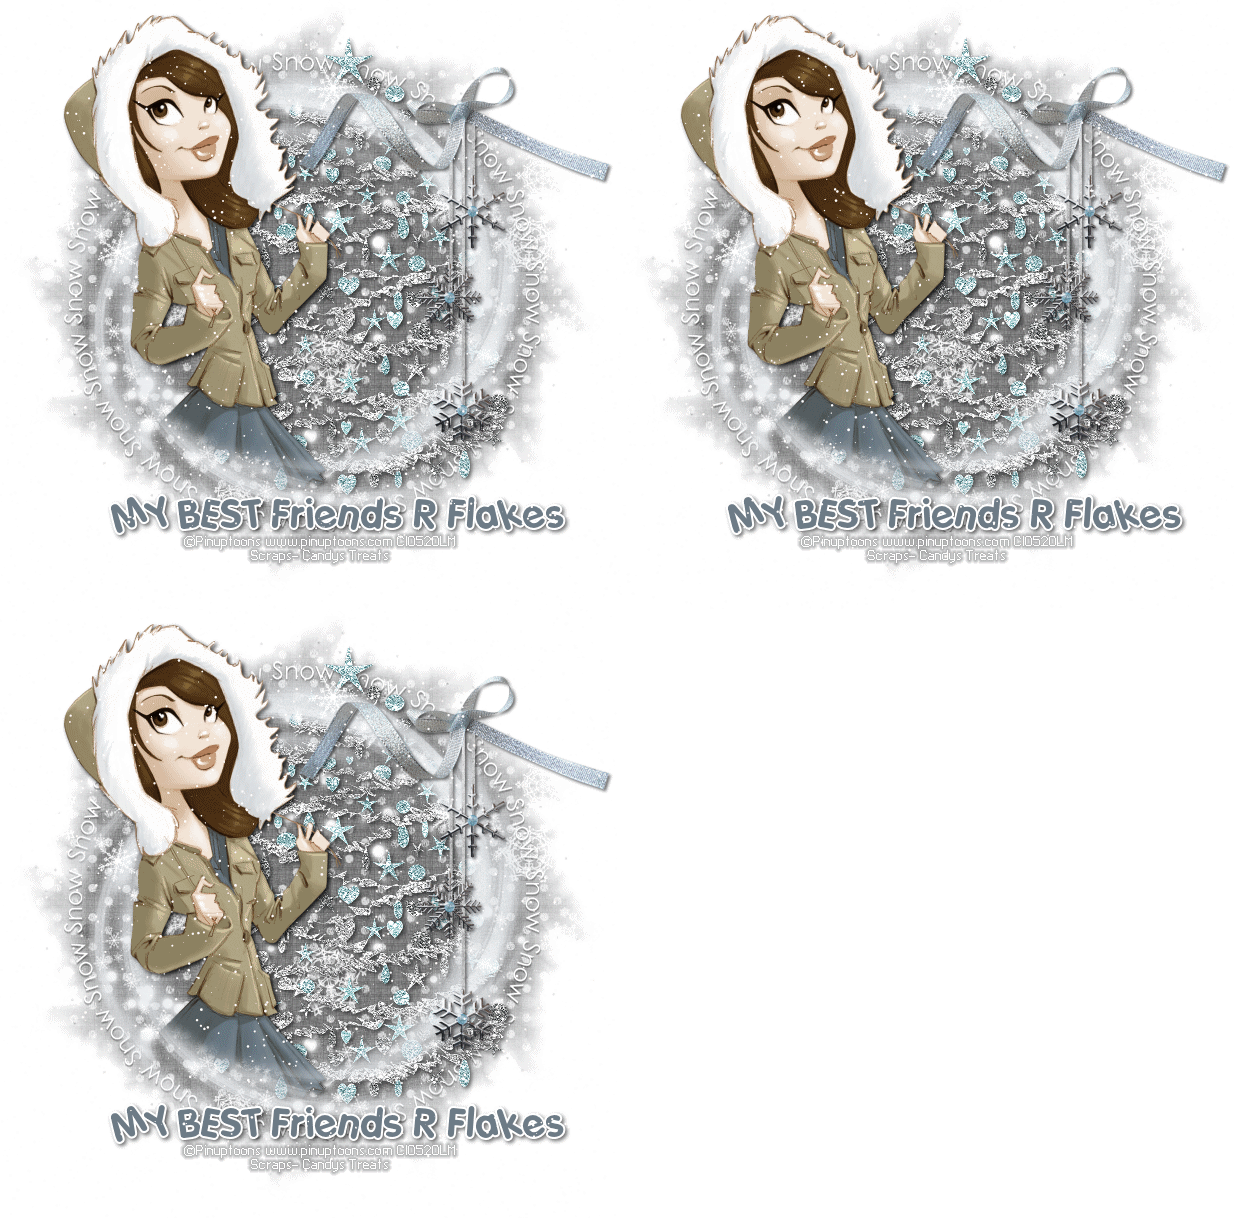
Hi again I have a new tutorial - called My Best Friends R Flakes..
click on the tag to see it fully
click on the tag to see it fully
PTU scrap kit by me called Snow is Falling
artwork by Pinuptoons you need a licence to use via CDO HERE,
Vanderlee - Snowflakes Plugin for the animation HERE , (its free)
Mask by Weescotslass NO.82 - HERE
Porkys free font HERE
............................................................................
add the masks to your masks folder
.........................................................
open a new canvas 650 x 650 with a white background
Lets start - open paper 7 its the dark grey with white spots paper
go to Layers - load save mask - load mask from disk , select the mask called -WSL-mask 82
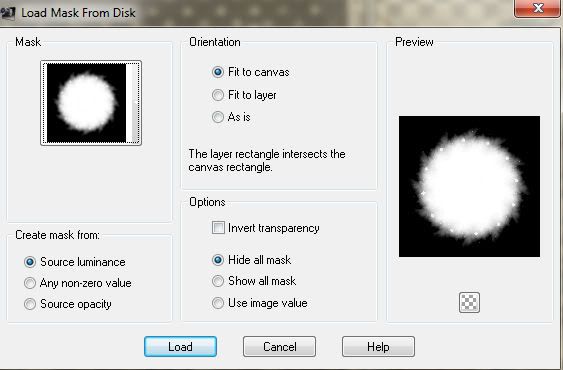
click load to apply it
go to - merge group
open snowflakes from the kit- copy and paste as a new layer
copy and paste winter-WA1 snow circle as a new layer -
resize by 80% using smartsize
open snowswirlframe1 copy and paste as a new layer
copy and paste winter tree as a new layer
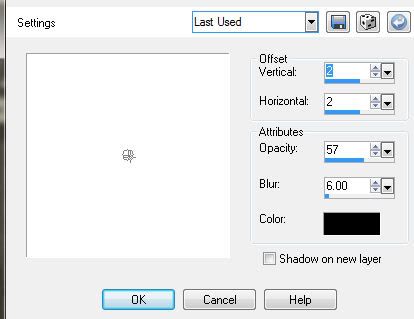
add a shadow , i used the following settings
the tube I used comes with a bonus close up, use that...
add as a new layer add a shadow then slide this layer beneath the tree layer
copy and paste winterFlakesWbow as a new layer
add a shadow as before
then duplicate and move this duplicate tube layer to the top layer
next, choose your eraser tool, i used the following settings

we are going to blend the tube layer with the swirl
so on the top tube I simply brushed the tube a couple of times where her skirt and legs were to erase it
so that you can see the swirl layer coming through then go to the bottom tube layer and do it again,
untill you are happy with the effect...
do not worry if you make a mistake just click the undo button and try again....
then add the words my friends are flakes in Porkys font
colour's used - background fill blue html code #6e7c87 - foreground white stroke 2

add copyright info
you could just save now as a .png
or to animate....continue
make the top layer active then add a new raster layer
and go to Effects - Plugins -Vanderlee - Snowflakes
depending how much snow you want, you can change the settings,
I used the following
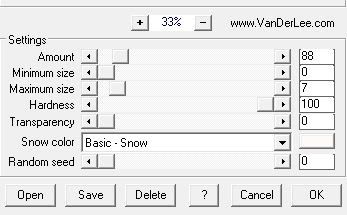
but if you want more snow change the amount slider
and if you want bigger flakes of snow change the maximum size slider
but as i said these were my settings..
click ok to apply the plugin
then go to copy merged and paste as new animation into animation shop
back to PSP
go to edit undo snowflakes
then apply it again but this time slide the random seed slider to 350
go to copy merged - and paste into animation shop after current frame
back to PSP
apply the plugin one final time, this time slide the random seed to 450
again go to copy merged - and paste into animation shop after current frame
edit - select all - then go to frame properties and
change the display time to 20 to slow the animation down a little...
save as a gif and your done , thanks for trying my tutorial, Diane x
Porkys free font HERE
............................................................................
add the masks to your masks folder
.........................................................
open a new canvas 650 x 650 with a white background
Lets start - open paper 7 its the dark grey with white spots paper
go to Layers - load save mask - load mask from disk , select the mask called -WSL-mask 82

click load to apply it
go to - merge group
open snowflakes from the kit- copy and paste as a new layer
copy and paste winter-WA1 snow circle as a new layer -
resize by 80% using smartsize
open snowswirlframe1 copy and paste as a new layer
copy and paste winter tree as a new layer
add a shadow , i used the following settings

the tube I used comes with a bonus close up, use that...
add as a new layer add a shadow then slide this layer beneath the tree layer
copy and paste winterFlakesWbow as a new layer
add a shadow as before
then duplicate and move this duplicate tube layer to the top layer
next, choose your eraser tool, i used the following settings

we are going to blend the tube layer with the swirl
so on the top tube I simply brushed the tube a couple of times where her skirt and legs were to erase it
so that you can see the swirl layer coming through then go to the bottom tube layer and do it again,
untill you are happy with the effect...
do not worry if you make a mistake just click the undo button and try again....
then add the words my friends are flakes in Porkys font
colour's used - background fill blue html code #6e7c87 - foreground white stroke 2

add copyright info
you could just save now as a .png
or to animate....continue
make the top layer active then add a new raster layer
and go to Effects - Plugins -Vanderlee - Snowflakes
depending how much snow you want, you can change the settings,
I used the following

but if you want more snow change the amount slider
and if you want bigger flakes of snow change the maximum size slider
but as i said these were my settings..
click ok to apply the plugin
then go to copy merged and paste as new animation into animation shop
back to PSP
go to edit undo snowflakes
then apply it again but this time slide the random seed slider to 350
go to copy merged - and paste into animation shop after current frame
back to PSP
apply the plugin one final time, this time slide the random seed to 450
again go to copy merged - and paste into animation shop after current frame
edit - select all - then go to frame properties and
change the display time to 20 to slow the animation down a little...
save as a gif and your done , thanks for trying my tutorial, Diane x



No comments:
Post a Comment