things you will need:
PSP and animation shop
and a fairly good knowledge of both, as we will be working with layers
this is just one method of simulating an eye wink, there are other's which i may cover later
here are a couple of previews of the wink Animation we will be learning about...
This tutorial hopefully will teach you 1 way to simulate the wink or a blink of an eye....
This tutorial was written by me Diane Knight on 18th FEB 2009 any resemblance to any other tut is purely coincidental
.............................................................
things you will need:
PSP and animation shop
and a fairly good knowledge of both, as we will be working with layers
this is just one method of simulating an eye wink, there are other's which i may cover later
artwork by Jennifer Janesko this particular image was a freebie that all customers got xmas 2008....you will need to buy a licence to use this artists work now at CDO. although I bought mine from CILM before CDO opened
see below for an example of another tag I made using the same method...all you really need is a good close up tube of a pretty eye with nice lashes...
place the brushes into your brushes folder so that they are ready to use later
..................................................................................
open a NEW canvas 500 x 500
i like room to work.... Floodfill with white
open up Lace2 (the white one) from the kit, resize by 70% using smartsize
copy and paste as a new layer onto your canvas
resize by 90%
add a drop shadow I used
Horizontal 2 vertical 2, opacity 80 blur 8
do the same for flower8 rotate it right by 5
copy and paste notepad1 from the kit, rezie by 50% then rotate right by 15%
slide this layer below the 2 flowers...so that it just pokes out from the bottom of them..
open up frame5 from the kit and resize by50% using smartsize, copy and paste onto your canvas, center it..
open up the chrome heart from the kit, resize the heart by 70% using smartsize
copy and paste it onto your canvas, then rotate right by 10%
position the heart so that it overlaps the frame like mine...
select the eraser tool using these settings

and erase the right hand corner of the chrome heart, and the top point..see below...
open a NEW canvas 500 x 500
i like room to work.... Floodfill with white
open up Lace2 (the white one) from the kit, resize by 70% using smartsize
copy and paste as a new layer onto your canvas
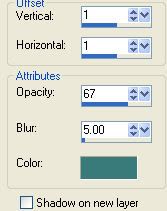
add the following drop shadow, make sure you change the colour to a Colour from your tag. I used Green colour HTML no #38797a
Ccopy and paste FLOWER5 onto your canvas, center it in your canvas.resize by 90%
add a drop shadow I used
Horizontal 2 vertical 2, opacity 80 blur 8
do the same for flower8 rotate it right by 5
copy and paste notepad1 from the kit, rezie by 50% then rotate right by 15%
slide this layer below the 2 flowers...so that it just pokes out from the bottom of them..
open up frame5 from the kit and resize by50% using smartsize, copy and paste onto your canvas, center it..
open up the chrome heart from the kit, resize the heart by 70% using smartsize
copy and paste it onto your canvas, then rotate right by 10%
position the heart so that it overlaps the frame like mine...
select the eraser tool using these settings
and erase the right hand corner of the chrome heart, and the top point..see below...

go to Image - mirror, one should now have appeared on the left corner, go to merge down..and eraser the bottom of the feathers, so you only see the top.
now add your imaage, if using the one i used, resize it by 70% then copy and paste it onto your canvas, slide it underneath the frame layer....when happy with position, remove the excess, you can either use the eraser tool as before,
or make the frame layer the active layer click on the magic wand tool and click inside the frame.go to Selection modify - expand by 4 then go to Selections Invert, and then make the image layer the active layer. and hit the delete key.
either way will remove the excess....if you used the selections way now go to selections none. if you used the eraser way there is no need as you have nothing selected.
then add a drop shadow to the frame layer
same as before
add the artist © and your name....
font used for my name was SHARK RANDOM FUN - with these settings
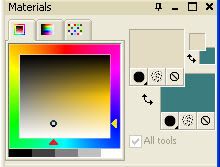
foreground set to this colour #e3dcc2
background set to this colour #3b7c7e
add your name using the settings above,.......................................
now onto the actual animation part of making her eye wink....
obviously you could do this to both eyes to make her blink too...
BEFORE we start to animate...go to Edit - copy merged and paste your tag into animation shop..
so you now have 1 frame with her eyes open....
back to PSP
make your image /tube layer your active layer...by simply clicking on it.
select your paintbrush tool, now zoom in so you can see clearly and using the round brush head on the following settings,

carefully paint over the eye , (I used the colour black) so that it looks half closed.... see below....

copy merged and paste into animation shop after current frame...
back to PSP
now we are going to colour in the rest of the eye in so that it appears to be completely closed, use the same brush settings as before...
once you are happy find the brush SK furryFibre3 you downloaded and set your brush to the settings below..
now carefully add lashes to the bottom of the now closed eye...
this might take a few tries to get it right...if you go wrong just click undo and try again...

zoom back out to take a look once your done
if you are happy, copy merged once again after current frame into animation shop
still in animation shop we are going to adjust the timing ...
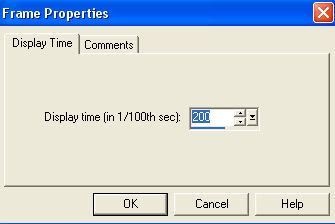
do this by going to Animation - Frame properties and change the display time to 200..
now view the animation you should have a nice wink like mine!
save it as a gif and you are done.
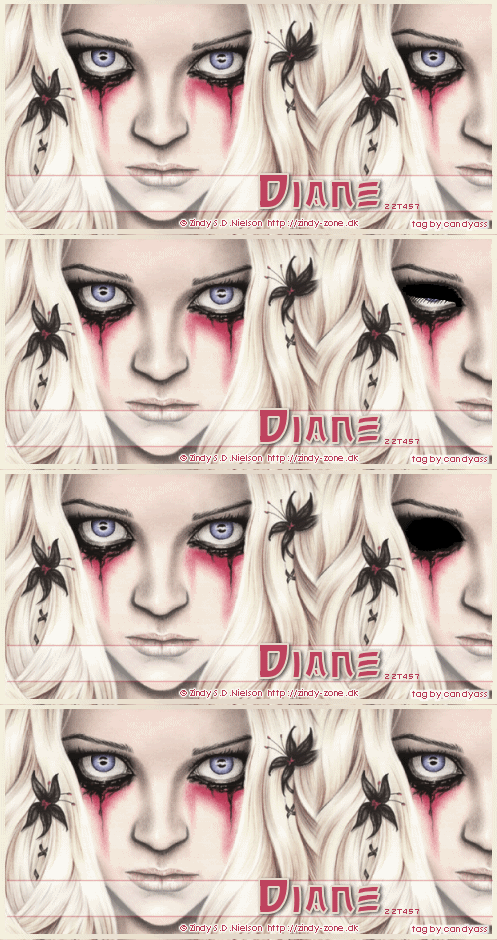
thanks for trying my tutorial ..here is another tag I made following the tut just for the eye wink.....the possibilities are endless..once you get the hang of it....




No comments:
Post a Comment