this tutorial simulates breathing
......................................................
......................................................
This scrap tag tutorial was written by me Diane Knight on 1ST FEB 2009 any resemblance to any other tut is purely coincidental
things you will need:
PSP and animation shop
and a fairly good knowledge of both
Template 129 by Missy HERE
artwork of Elias Chatzoudisyou will need to buy a licence to use this artists work at PTE
.................................................
unzip supplies place the mask in your masks folder
and open up template 129
Delete the missy watermark
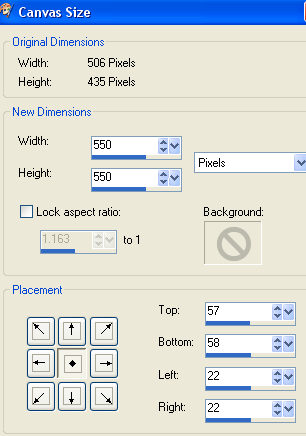
now i want a larger canvas so that i have room to work,
so go to Image - canvas size and change the
canvas size to 550 x 550 make sure it is centered,
see settings below...
now re fill your background layer with white
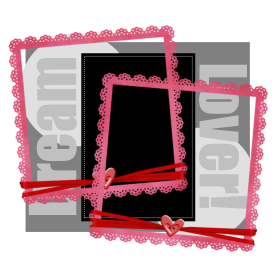
open the Square Frame from the kit resize by 60% using smartsize then go to
Image - Rotate- free - rotate Left by 5
copy and paste this frame onto your canvas and place at the top left of the template,
Duplicate this frame and then go to Image - Mirror,
slide this one down and to the right..see below....
merge down, and slide the frames underneath the template...
make the Square from the template the active layer, and click inside it with your magic wand tool...
go to Selections - modify expand by 1
and copy and paste paper7 into selection, then duplicate it...
go to Selctions - Select all - selctions Float - Selections - modify expand by 1
and copy and paste paper 2 INTO selection
make the original square the active layer and rotate left by 5
add a dop shadow to both papers, I used
vertical 2 Horizontal 1 opacity 57 blur 4
make the wordart the active layer and copy and paste paper 1 into selection
add a drop shadow I used vertical 1 Horizontal 1 opacity 44 blur 3
merge the 2 circles on the template together by making the top circle the active layer and go to
Layers merge down...
then go to Selctions - Select all - selctions Float
Selections - modify expand by 1 and copy and paste the stripe paper into selection
add a drop shadow...
this is what you should have so far...
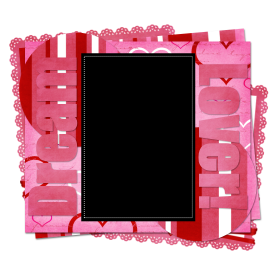
make the rectangle from the template the active layer go to
Selections - Select all - selctions Float, then
Selections - modify expand by 1
and copy and paste Journal 2 as a new layer
go to Selections INVERT and hit the DELETE KEY.
again add a slight drop shadow.
open the double heart from the kit, resize by 35%
using smartsize and place at the bottom right ,above the rectangle but below the wordart.
now add the red 'LoveMetal' word charm from the kit, resize by 60%
select the magic wand tool, and clcik inside the ring/stud just below the bow...
go to Selections modify - expand by 5 and then in your layers palette find the paper layers that are below and hit the delete key... for both
layers..you will then see a hole appear inside the ring/stud..
make the charm layer active and add a drop shadow.
now we are going to add a mask, first copy and paste paper 2 as a new layer,
now apply the Vix_Mask_Valentine13, do this by
going to Layers - Load/save mask - load mask
from disk
and find the mask called Vix_Mask_Valentine13
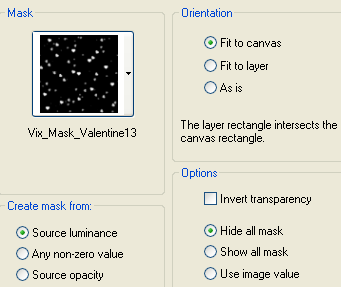
apply it...
go to Layers Merge Group.
resize this layer by 90% and slide it underneath the rectangle layer...
you should now have something that looks like this...
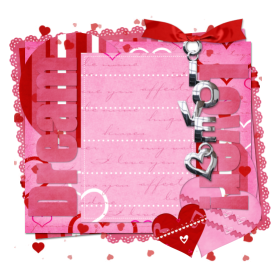
hopefully you are with me so far..
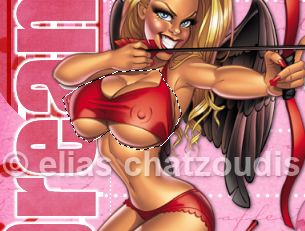
now add the tube of choice, I am using a tube by
Elias Chatzoudis, if using the same as me then resize it by 80%
add a drop shadow...
now the fun part...
copy merged tag into animation shop...
then...
go back to PSP
select your freehand selection tool looks it looks like a lasoo on your toolbar..
using the following settings
look carefully at my area below, you want to the selected area like mine...
go to Effects - Distortion Effects - Punch
change the stregth to 10
go to selections none
copy merged into animation shop this time after current frame...
backto PSP
click undone this will bring back your selection
go to Effects - Distortion Effects - Punch
change the stregth to 15
go to selections none
copy merged into animation shop after current frame ...
you now have a 3 frame animation...
if you saved at this point she is gonna look like she is panting!
view the animation and see what i mean...lol..
ok if you viewed the animation close the playing animation down you do not need it
but keep the original open...
if you want her breathing to look more slow and realistic.. you will need to do the folowing...
go to EDIT - SELECT ALL
then go to ANIMATION - FRAME PROPERTIES.
and change the display time to 25.
with all 3 frames selected, go to Edit Copy, and paste as a new animation
so now you have 2 three frame animations
with the second animation selected
go to EDIT - SELECT ALL
then go to ANIMATION - REVERSE FRAMES
GO TO EDIT - COPY then click on the last frame of the original animation
and go to PASTE AFTER ANIMATION.
Then just save as a gif and your are done!..thanks for trying my tutorial
Diane x




off white outlet
ReplyDeleteoff white jordan
jordan travis scott
bape outlet
golden goose
nike off white
hermes bag
jordan shoes
cheap jordans
fear of god clothing
hermes outlet
ReplyDeleteyeezy gap hoodie
off white jordan
steph curry shoes
kyrie 9
off white
yeezy outlet
giannis antetokounmpo shoes
bape sta
bape