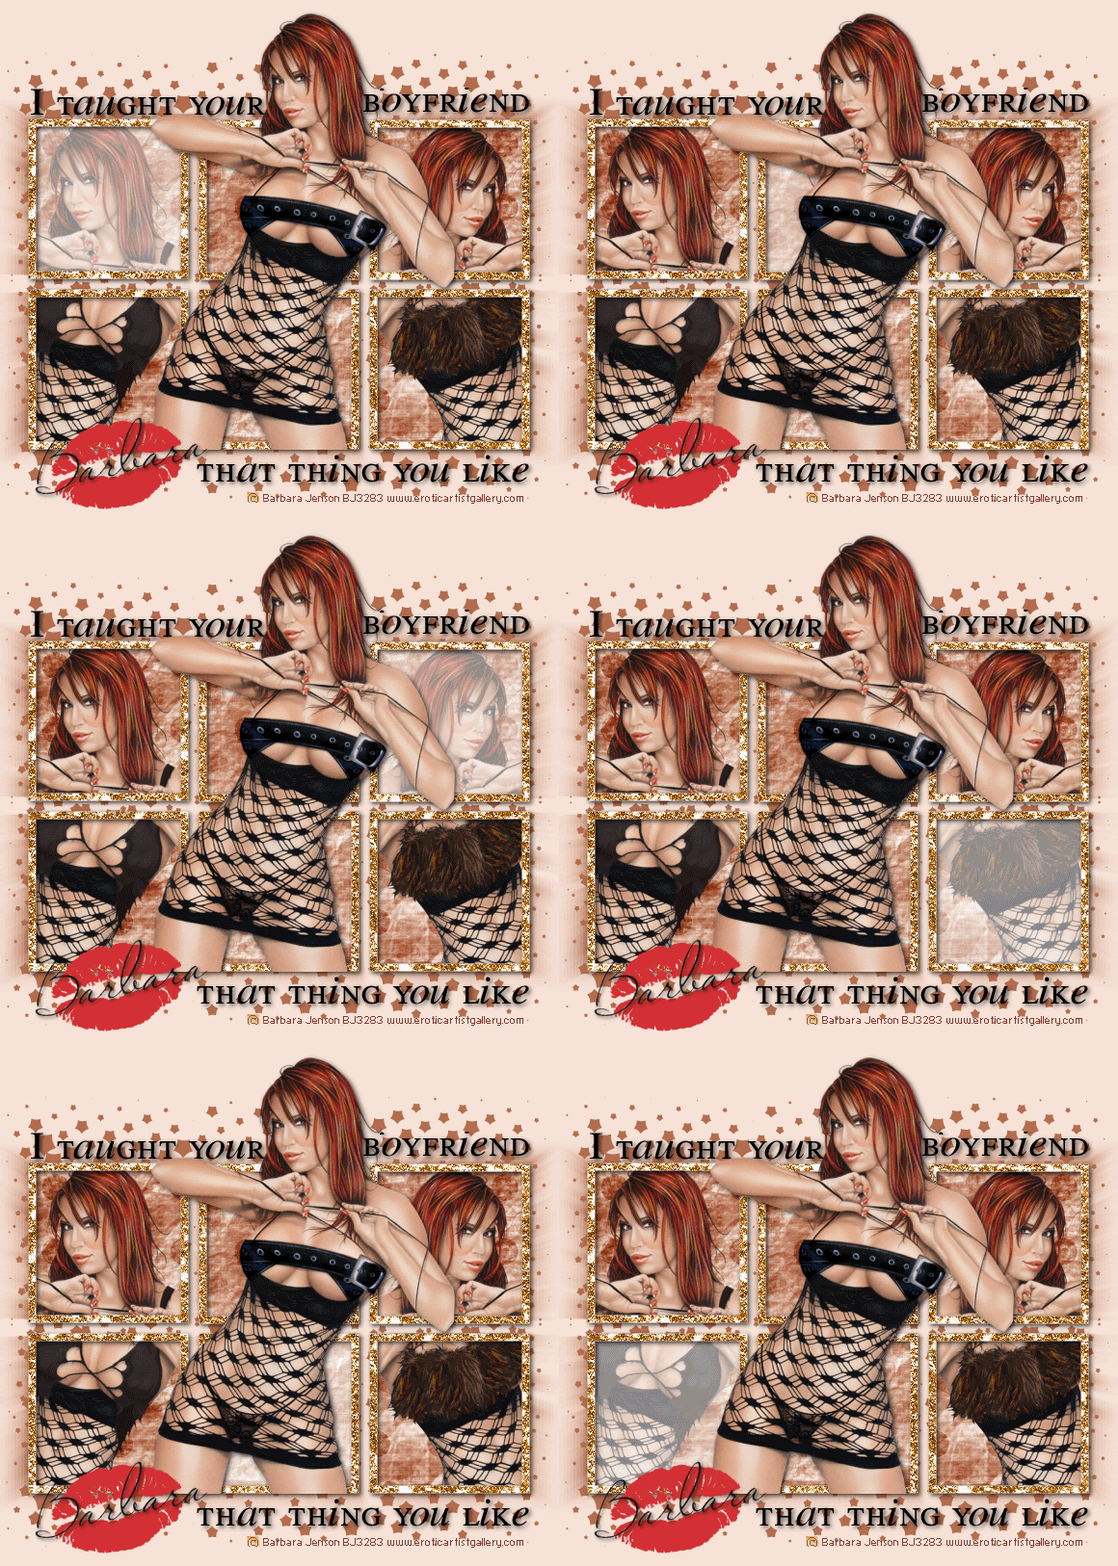
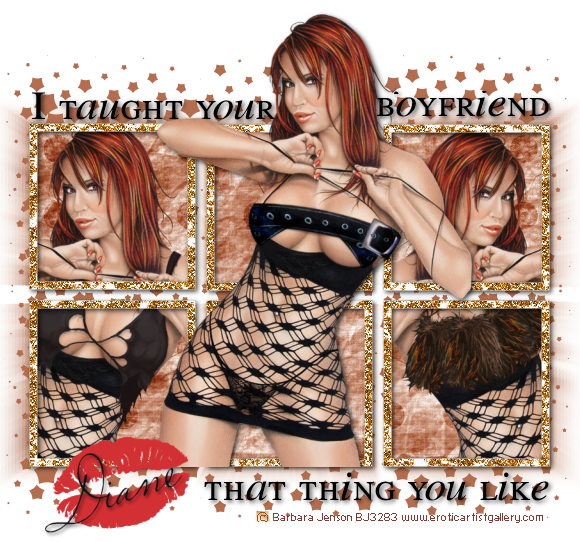
click on the preview to see the tag full size
.......................................................
you will need the stunning artwork of Barbara Jenson
you can purchase her tubes from her site HERE
you can purchase her tubes from her site HERE
A template from the Creative misfits blog HERE (13th Download down)
some free to use supplies by me HERE
and a couple of plugins :
mura's meister - copies and Halftone -
if you dont have them just google them and install them
..........................................
open up template no 4 and delete the watermark layer
find your top black frame
make this your active layer simply by clicking on it
make this your active layer simply by clicking on it
in your layers pallette.
we are going to merge all the black boxes together,
we are going to merge all the black boxes together,
so go to Layers - Merge- merge down
keep doing this untill all 6 black bloxes are on the one layer together.
then go to selections - select all- then selections - float
then go to selections - select all- then selections - float
(this will select all the boxes at once)
now copy and paste a tube as a new layer, arrange it over the left 2 boxes
now copy and paste a tube as a new layer, arrange it over the left 2 boxes
now go to selections invert then make certain your tube layer is your active layer
and hit the delete key on your keyboard to remove the excess tube...
go to selections none
for the right side i used a variant of the same tube,
but before copying and pasting over I mirrored it,
do this by simply going to Image - mirror
so now repeat this process for the right side,
remember to go to selections none to deselect the boxes
copy and paste another tube arrange this as the top layer
remember to go to selections none to deselect the boxes
copy and paste another tube arrange this as the top layer
if it isnt on top go to layers - arrage - bring to top
for this particular tube I added a drop shadow
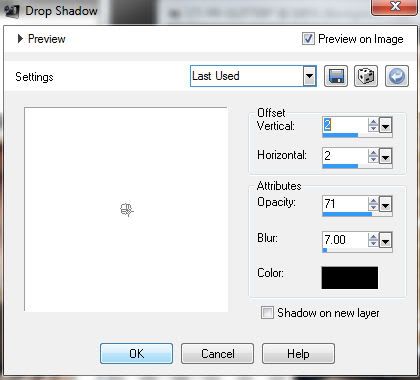
- then with my selection tool set to rectangle
I simply 'cropped out' the parts of her legs that went over the bottom box.

- then with my selection tool set to rectangle
I simply 'cropped out' the parts of her legs that went over the bottom box.
next on the wordart layer of the template, with your selection tool still set to rectangle,
crop out the word boyfriend, and cut and paste as a new layer,
then move it over to the right side
(otherwie you cant read it, her head is in the way :)
selections none.
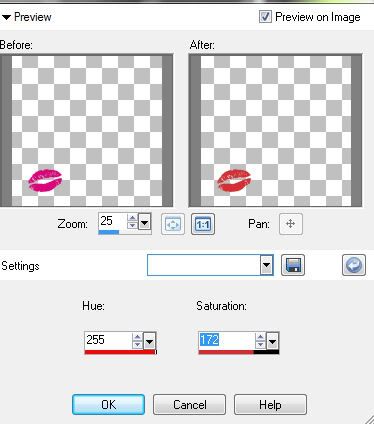
next for this particular tube the colour of the lipstick kiss didnt match very well,
selections none.
next for this particular tube the colour of the lipstick kiss didnt match very well,
so i adjusting it by going to
Adjust - Hue & Saturation - Colourize
with the following settings,
with the following settings,
click ok
bring this to the top layer
next find the top grey frame layer on the template and just as we did before, we are
going to merge down, untill all the grey frames are on the same layer
then go to Selections - select all - selections - float -
bring this to the top layer
next find the top grey frame layer on the template and just as we did before, we are
going to merge down, untill all the grey frames are on the same layer
then go to Selections - select all - selections - float -
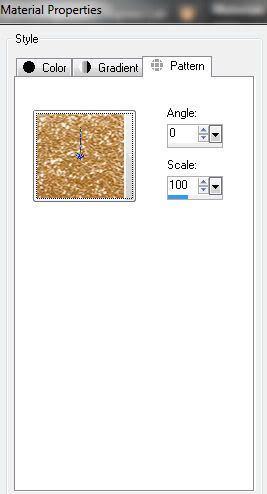
leave selected, now open the glitter tile I supplied, and make this your background fill
do this in the material pallette, so just click on the
background fill colour and in the pop up choose pattern tab
and in the drop down find the glitter fill,
select it and click ok
then choose your fill tool, it looks like a paintbucket and simply click inside
each grey frame area that you have selected on the template.
go to selections none
add a drop shadow
find your black boxes layer again make this the active layer and
go to select all - selections - float
open the texture I supplied, and copy and paste as a new layer,
then selections invert - hit the delete key to remove the excess
go to selections none
duplicate this layer
now is a good time to crop any excess from the edges of your tag
then on the bottom duplicate go to
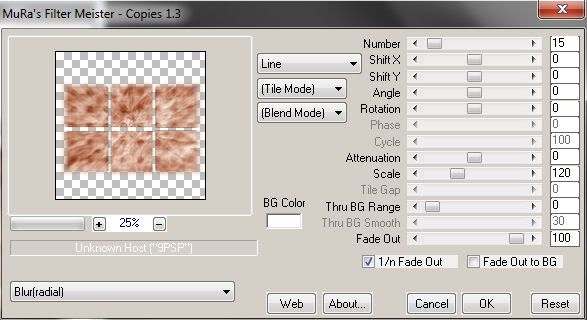
effects - plugins - mura's meister - copies
with the following settings - Blur(Radial)
then duplicate that layer twice
then go to
then go to
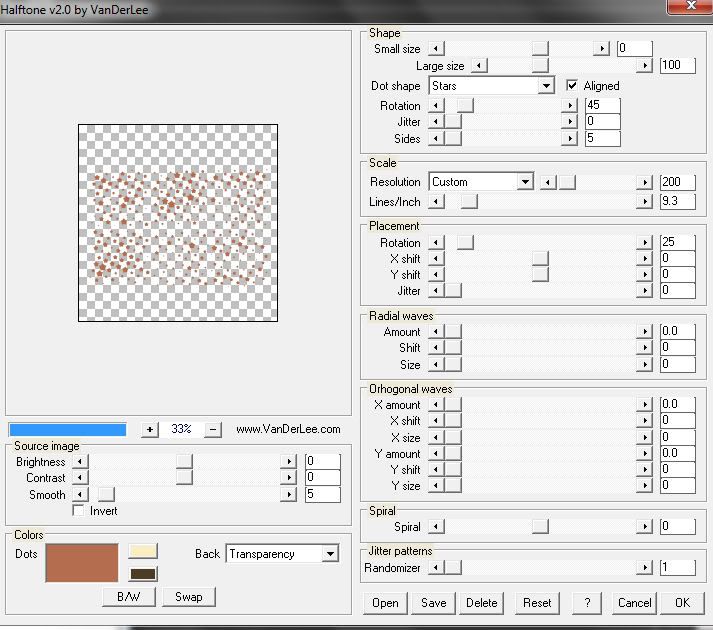
effects - plugins - Halftone
with the following settings -
click on the preview if you need to see the settings clearer
change the colour with the colour picker, i just colour picked a colour from the tag itself...
change the colour with the colour picker, i just colour picked a colour from the tag itself...
arrange on the tag a little lower so that it peeks out from the bottom
then do the same for the second duplicate and arrange it higher to your liking...
add a drop shadow to the word art layers
now is a good time to add your name and copyright,
font used for my name was miss le Gatees
save your tag with a unique name and as a png
and you are done x
........................................
unless you want to animated of course.... :)
unless you want to animated of course.... :)
.......................................................
when working with animation you dont want to move anything that isnt supposed to move once you start to animate, also another point to make I generally save my tags as a .png this saves the tag with a transparent background, like the one above, as i am a member of a few forums that have different coloured backgrounds...however this is not the case when saving an animated tag...it tends to go pixelated if i save an animation with a transparent background so i usually save it on a coloured background.
so first add a new layer and floodfill with a colour of your choosing, one to compliment the tag....
go to layers - move to bottom
have your glitter frame layer as the active layer - click inside the first glitter frame - you have added a shadow so you will need to expand it
have your glitter frame layer as the active layer - click inside the first glitter frame - you have added a shadow so you will need to expand it
go to Selections - modify - expand by 8
add a new raster layer and floodfill the slection with white
go to selections none
then drop the opacity of the layer to 50% now slide this layer underneath the glitter frame, because you want it to look smooth and tidy.
ok now go to copy merged and paste into animation shop as a new animation
add a new raster layer and floodfill the slection with white
go to selections none
then drop the opacity of the layer to 50% now slide this layer underneath the glitter frame, because you want it to look smooth and tidy.
ok now go to copy merged and paste into animation shop as a new animation
go back to PSP
then simply move the white box over to the midle top box,
then simply move the white box over to the midle top box,
then copy merged and paste after current frame in animation shop
back to PSP and move the white box to the top right frame
copy merged and paste into animation shop after current frame
back to PSP and move again to the bottom right frame, and so on and so on untill you have 6 frames
finally then in animation shop go to edit - select all
go to animation - frame properties and change the display time to 20 - click ok
this will slow the animation just a little
save as a gif and you are done.
thanks for trying my tutorial



thank you for the tutorial I enjoyed doing it couldn't get it as smooth as yours
ReplyDeleteyou mean the animation wasnt as smooth? did it jump a bit ? its important to not move any layers or anything on the tag once you start copying and pasting into AS..
ReplyDeleteThank you for the tut :)
ReplyDelete