Soooo I have been trying to go back to writing some old schol type tuts,
I like to try and have some variety on my tut site, let me know what you think.....
this one uses no scraps, templates or anything, just a dingbat font and a mask so it should be pretty simple for newbies too....well thats my hope anyway....
For this tut I am using the fantastic artwork of Russell Platt
you can purchase his tubes from UYA.
needed:
VIXPSP mask 143 get it from her site HERE
add the mask to your mask folder
Nanson's RAVEN gradient here
free font's used - Crop circles dingbat HERE
Amethyst Script HERE
Badaboom font HERE
..............................................................
before we start.....
Add the mask to your mask folder
gradientto your gradients folder and so on ....now open psp
Open a new canvas 500 x 500 pixels ,
floodfill with white using the paint bucket tool. i like using a white background as it allows me to see eveything properly, but i usually end up deleting the white background at the end.....
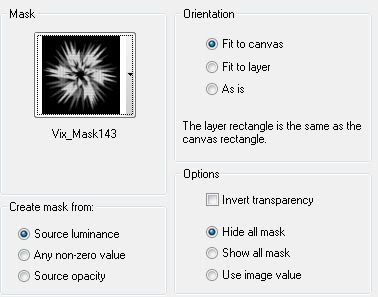
Choose the mask named vix_Mask 143 and use these settings
 click on apply...
go to Layers - merge group
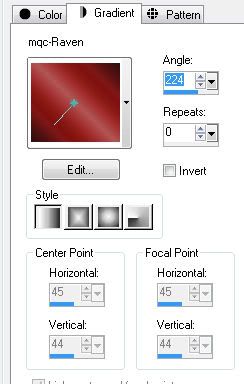
set your material pallete to white foreground and your background set to your gradient , these are my settings for the gradient

click ok....
next choose the font tool, (its the big 'A')
now look for the dingbat font in the dropdown menu these are my settings

press the comma key and your dingbat should give you a shape
go to - layers - convert to raster
arrange to the centre of the canvas
add a drop shadow
add tube of choice as a new layer,
if using the same one as me i resized mine using smartsize by 80%
duplicate the tube, then drag this
duplcate below the dingbat shape layer
make the top tube your active layer simply by clicking on it in your layers pallette
add a shadow to this layer.
next make the dingbat shape the active layer and using your magic wand tool click inside the dingbat shape,
go to Selctions modify expand by 2
then go to selections invert, now choose your erasor tool set on these settings,

erase the parts of her legs that poke out from the dingbat shape on both tube layers
go to selections none once done.
ok look at your tag, on the top tube make sure you can see the dingbat shape properly, i found that the white outline was slightly covered by the top tube so just to tidy up properly, go over the top tube with your erasor tool a couple of swipes at the bottom to make sure it looks really tidy....

add a drop shadow.
now change the font to Toonish, change the background colour to black , leave the foreground white, add the text 'FIGHTER' with these settings
now would be a great time to add any of ther text you want on it, like your name and copyright and your done..
if saving as a .jpg leave as is
I hope you enjoyed my tutorial


No comments:
Post a Comment