I use PSP9
MASK: by Vix 349 HERE
I am using the fantastic artwork of RION VERNON (pinuptoons)
This is a pay to use artist so you should not use this artists work without purchasing the appropriate licence to do so - these days From CDO HERE
and this really cute Scrap kit called LoveBug by Clarey which you can purchase HERE her blog is HERE thanks hunnie x
font i used for the name is: LDJ Jilly Nilly free from here
......................................................................................
Open a 550 x 550 pixels canvas
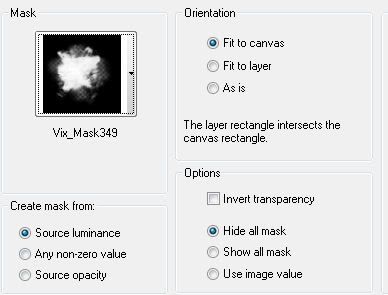
Choose the mask named Vix_Mask349 and use these settings

click on apply...
go to Layers - merge group
open up dot frame2 resize by 60% arrange over the large circle,
duplicate then resize agan by 65% and arrange over the small frame
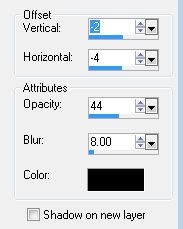
add a drop shadow to each layer as you go, i used
vertical -2, horizontal -4, opacity 44, blur 8

then add a paper frm the kit, i used the stripe paper,
click the frame layer to make it the active layer and click inside with the
magic wand tool, click inside both circles while holding down te shift key, go to selections modify - expand by 4
then go to selections invert and hit the delete key to delete the excess.
selections none
add 2 leaves from the kit add the pink flower resize by 80% and copy and paste the pink ribbon, slide this beneath the flower and leaves
now to add the tube, and slide it beneath the frame layer, erase the parts that poke out from the bottom of the frame with your erasor tool on a soft edge setting
i used the following settings:

then duplicate the tube and slide the duplicate to the top layer
add a drop shadow and then erase the parts by her left arm and stomach so that you can see the pink ribbon again. and her head appears to poke out from the frame
now to add more flowers and leaves ......the blue large one
i did not resize, the brown and pink i resized by 70%
and then added some leaves, remember to add a drop shadow to each layer
add a couple small flowers resize by 30% and arrange to the bottom left under the frame
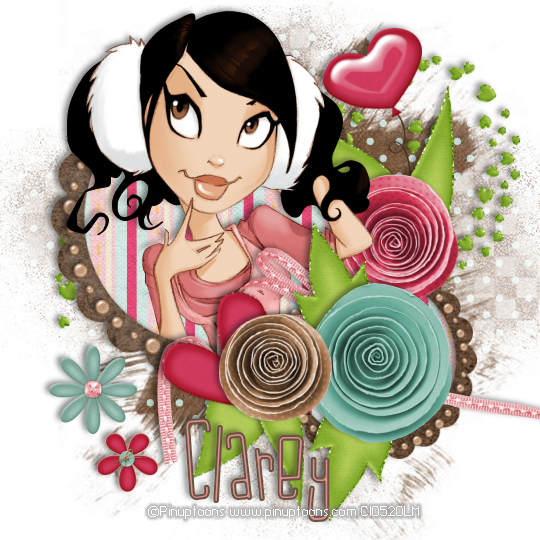
add your copyright and name and your done.
font i used for the name is LDJ Jilly Nilly - size 72
hope you enjoyed this tut
hugz diane x
i used the following settings:

then duplicate the tube and slide the duplicate to the top layer
add a drop shadow and then erase the parts by her left arm and stomach so that you can see the pink ribbon again. and her head appears to poke out from the frame
now to add more flowers and leaves ......the blue large one
i did not resize, the brown and pink i resized by 70%
and then added some leaves, remember to add a drop shadow to each layer
add a couple small flowers resize by 30% and arrange to the bottom left under the frame
add your copyright and name and your done.
font i used for the name is LDJ Jilly Nilly - size 72
hope you enjoyed this tut
hugz diane x


No comments:
Post a Comment