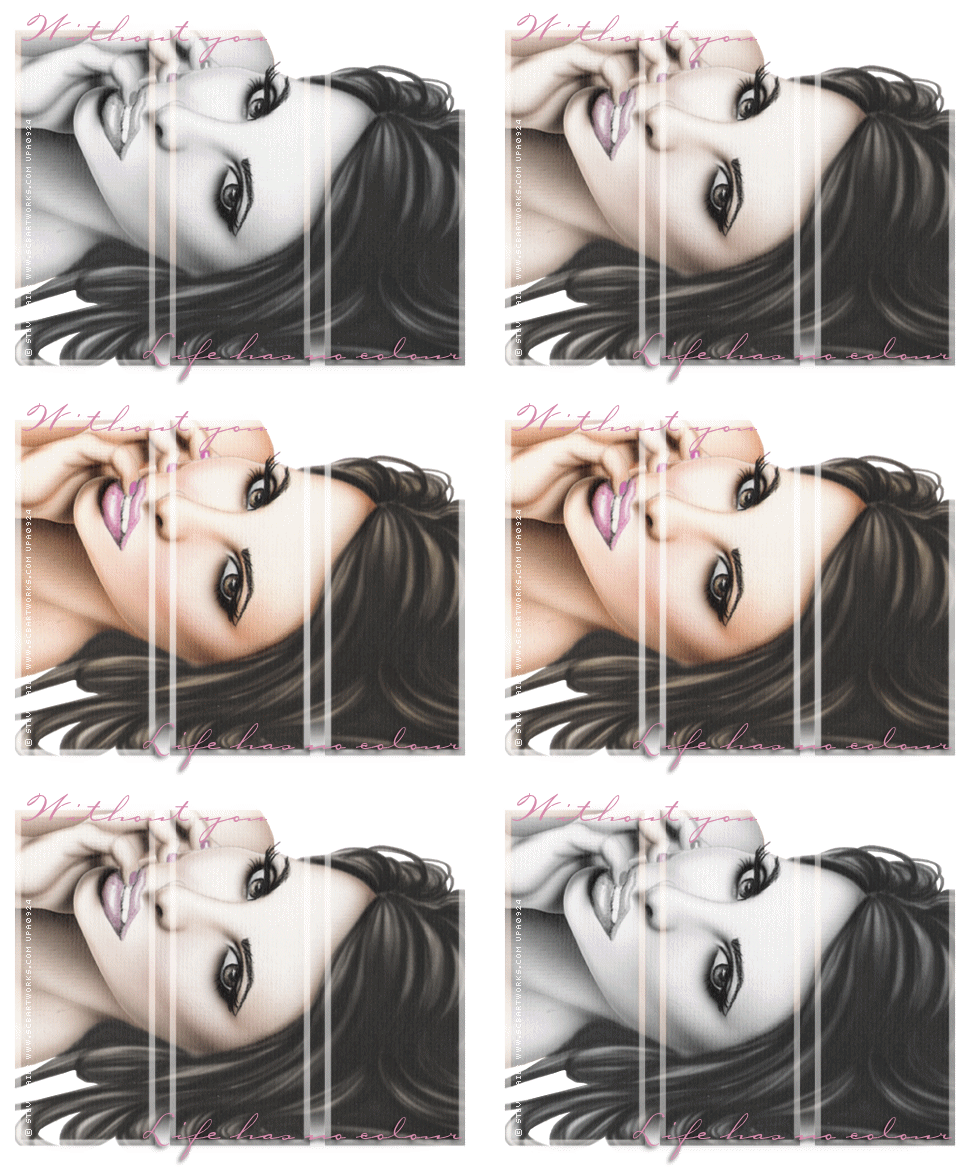
For this tut I am using the fantastic artwork of Steve Baier
you can purchase his tubes from UYA.
mask needed:
weescotslass mask 148 get it from her blog here
add the mask to your mask folder
font used - carpenter
...................................................
Open a 500 x 500 pixels canvas , floodfill with white.
copy and paste your tube of choice onto your canvas as a new layer
Layers- Load/save Mask - Load mask from disk
Choose the mask named WSL_Mask 148 and use these settings
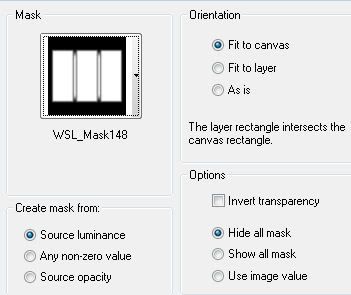
click on apply...
go to Layers - merge group
now duplicate this layer and on the top layer
go to
Adjust – hue and saturation – colourise
And use the settings below
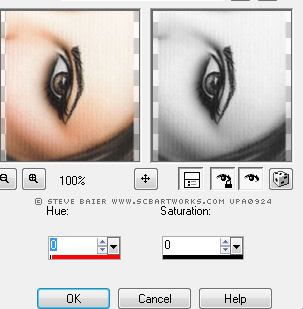
add a drop shadow
then add the text 'life has no colour' add a drop shadow.
go to Layers -merge down so the 2 text layers are merged.
now would be a great time to add any of ther tex you want on it, like your name and copyright, as you dont want it jumping around when you come to animate it in Animation shop.
once done, copy merged then
open ANIMATION SHOP and Paste as A NEW ANIMATION
and we are going to make the top tube layer invisible by simply licking on the little eye on that layer
then copy merged again and
PASTE AFTER CURRENT FRAME in ANMATION SHOP
still in animation shop click on frame 1 to make sure its selected
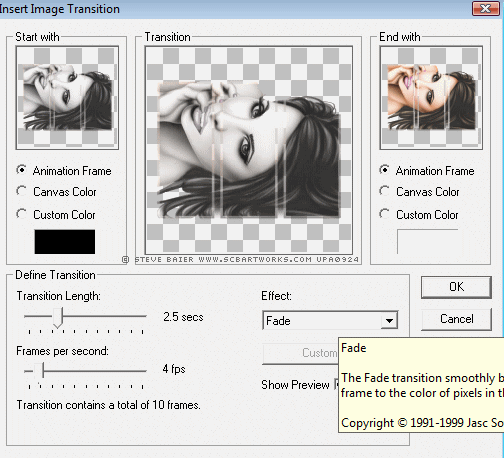
now go to Effects - Insert Image Transition and use the following settings...
now you will have a 10 frame animation. go to Edit - select all
then Edit - Copy and paste as a NEW ANIMATION...now go to select all, then go to ANIMATION- REVERSE FRAMES...
then select all
then edit- copy
now go back to the original animation click on the last frame (frame10) and paste AFTER current frame....
close animation 2 you do not need it.
now i want to slow the animation down a little a i think it looks smoother....
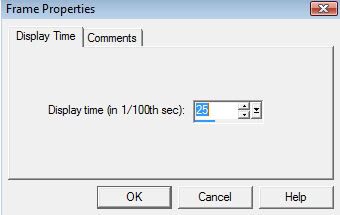
so go to - select all, then go to Animation frame properties and change the display time to 25
Thats it your tag should have a smooth transition from grey to colour... save as a gif and your done...
I hope you enjoyed my tutorial



No comments:
Post a Comment