

For this tut I am using the fantastic artwork of Jay Trembly
you can purchase his tubes from UYA.
a nice texture i used Texture_006 from ArtPlusLove HERE
2 MASK'S needed 1 from Vixpsp - Vix_Mask395 from her site HERE
and 1 from Weescotlass mask 116- HERE
Flaming Pear - Flood plugin HERE
font used was Bacon
........................................................
Open a 500 x 500 pixels canvas , floodfill with white.
duplicate this tube
on the bottom tube apply the flood plugin by going to
EFFECTS- PLUGINS - FLAMING PEAR - FLOOD

click oknow add the Weescottslass mask , do this by going to
Layers- Load/save Mask - Load mask from disk
Choose the mask named WSL_Mask 116 and use these settings

go to Layers - merge group
click on the top tube to make it the active layer and add a drop shadow, i used the following settings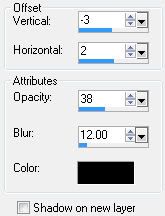

Copy and paste the texture oo6 as a new layer and slide this layer beneath both tube layers
now copy and paste as an new layer the bonus closup of the tube and arrange to the left side change the blend mode to luminence legacy by going to - Layers - properties - and in the drop down menu and choose Luminence legacy

so the close up tube and texture layers are now merged.
now add the vix mask 395 on the follwing settings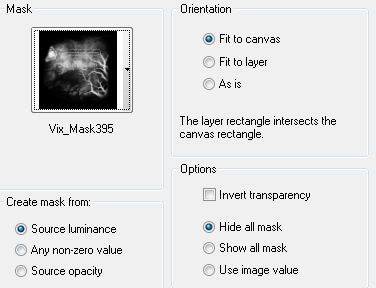

go to Layers - merge - merge group
now its time to add our name and copyright, for my name i used Bacon font dark blue background fill and a light grey for the foreground fillwith these settings stroke 2

ok save as a jpg and your done...
...........................................................
HANDY TIP FOR NEWBIES BELOW
..........................................................
if you would like to save as a tranparent background, which is useful for forums etc, so you dont get the white background, simply delete the white background layer and save as a .png file instead. :)


No comments:
Post a Comment