This tutorial was written by me on 08th March 2012 any resemblance to any other tut is purely coincidental
For this tut I am using the fantastic artwork of Steve Baier
you can purchase his tubes from UYA. i used the tube entitled Written in your eyes.
Lets begin by unzipping your supplies, and adding the mask to your mask folder
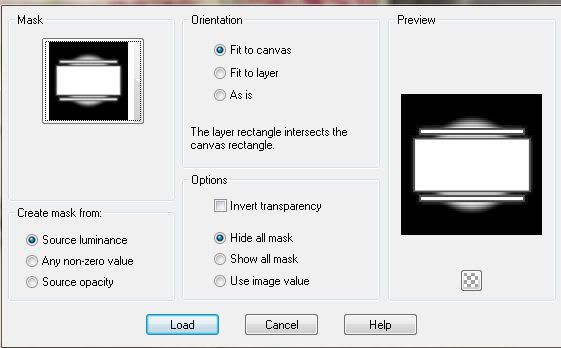
apply mask by going to Layers - Load/Save mask from disk
WSLmask145
go to selections none
you can delete the grey rectangle layer now as you do not need it.
then select the thin rectangle and and floodfill with colour I used black, add a drop shadow.
then select the 3 small squares on the template by going to select all - selections float , then open up youe tube and paste as a new layer, once you are happy with the position of the tube
go to selections invert and hit the delete key to remove the excess
go to selections none
repeat this process again with the tube for the main rectangle with the main image.
resize flowers by 20% add a drop shadow and position them untill you are happy
add my 'In your eyes' wordart.
crop around your tag for neatness add a drop shadow to any of the rectangle layers if you havent already done so.....
add your name and the artist © information
save your tag with a unique name and your done.
Till next time
Diane x


Tutorial doesn't specify which template to use
ReplyDeletewhat are the two fonts
ReplyDeleteWhich Template Pleas..
ReplyDeleteGREAT tut! Really enjoyed doing it!
ReplyDeletematerials doesn't work specify
ReplyDeletefrom this tutorial
template 36 was used , sorry have now updated the tut x
ReplyDeleteI too, would love to know what fonts you used.
ReplyDeleteI know the 'E' is Zinco, and it's a free font: http://fontpark.net/en/font/zinco/
ReplyDeleteAnd great tut, by the way! Thanks for sharing :)
ReplyDelete