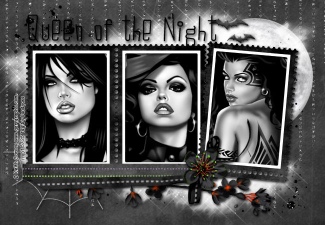
For this tut I am using the fantastic artwork of Keith Garvey
you can purchase his tubes from PTE
open up frame6 from the kit,
go to image - mirror then
adjust hue and saturation - both to zero
adjust the brightness and contrast
open up the glitter spill resize by 60%
copy and paste as a new layer and slide below the frame, arrange to left, then duplicate and arrange to right slightly lower than the left
resize moon from kit by 40% and arrange to the right, slide layer below the frame layer
open up cloud1 from the kit, go to image - flip
then copy and paste as a new layer below the frame layer arrange on the canvas over the moon, duplicate the cloud and go to image - mirror
resize by 90% then arrange on the canvas so that it peeks out of the bottom of the frame
open up bats, resize by 20%
add a drop shadow i used vertical 2 horizontal 2 opacity 90 blur 6
open up the spiderweb resize by 40%
add drop shadow as before ahe and arrange to the left o that it peeks out from the bottom left of the frame
open up orange and black flowerstem arrange to the bottom of the frame and with your erasor tool erase the parts ou do not need....
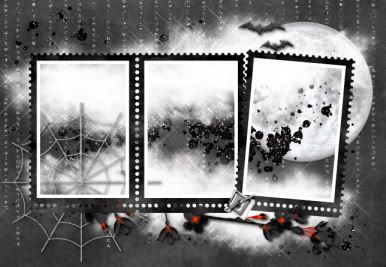
so far you should have something like this....
open up spookyribbonBlack, go to image - mirror,
resize by 80%
with your freehand selections tool
here is my settings

you can purchase his tubes from PTE
3 tubes i used were KittyKat close up HERE, ScarletCU from the close up pack HERE or the single tube is HERE but its smaller and lastly Vamp HERE
For this tut you will need PSP,
ptu - Spookylicious scrap kit by me get it fromTwilight Scraps under Candys Treats HEREor Digital Chaos
LDJ Jilly Nilly font free HERE
dont forget to check out my blog for freebies HERE
....................................................
you will need to Unzip any supplies
....................................................
you will need to Unzip any supplies
OPEN A NEW CANVAS 650 x 450 resolution 72
copy and paste SpookyGlitterBlack1 paper from the kit as a new layer onto your canvasopen up frame6 from the kit,
go to image - mirror then
adjust hue and saturation - both to zero
adjust the brightness and contrast
brightness to 8 contrast to 38
copy and paste as a new layer onto your canvas
copy and paste as a new layer onto your canvas
open up the glitter spill resize by 60%
copy and paste as a new layer and slide below the frame, arrange to left, then duplicate and arrange to right slightly lower than the left
resize moon from kit by 40% and arrange to the right, slide layer below the frame layer
open up cloud1 from the kit, go to image - flip
then copy and paste as a new layer below the frame layer arrange on the canvas over the moon, duplicate the cloud and go to image - mirror
resize by 90% then arrange on the canvas so that it peeks out of the bottom of the frame
open up bats, resize by 20%
add a drop shadow i used vertical 2 horizontal 2 opacity 90 blur 6
open up the spiderweb resize by 40%
add drop shadow as before ahe and arrange to the left o that it peeks out from the bottom left of the frame
open up orange and black flowerstem arrange to the bottom of the frame and with your erasor tool erase the parts ou do not need....
so far you should have something like this....
open up spookyribbonBlack, go to image - mirror,
resize by 80%
with your freehand selections tool
here is my settings

make the ribbon shorter by selecting the portion you want to remove , double click to close the selection then delete the excess by hitting the delete button on your keyboard
add a drop shadow i used horizontal 3 vertical 2 opacity 90 blur 7
open up flower2 resize by 30% add a shadow arrange over the bow of the ribbon
open up SpookyGlitterMix4 paper, make a rectangle selection wth your selection tool, make the seelction almost the width of the paper but only select 2 glitter lines, then cut and paste your selection on to your canvas, now resize by 50% ad a drop shadow an arrange under the ribbon
so far this is what you should have
for the text i ued LDJ Jilly Nilly font - type out the text Queen of the Night
font size 48
add a shadow, then add your name
now for the tubes...
you do not have to use black and white tubes, i didnt...
you do not have to use black and white tubes, i didnt...
I used colour ones and made them black and grey
copy and paste your tube as a new layer, i Started with Kitty kat close up resized by 80%
adjust hue and saturation just like you did with the frame...
adjust hue and saturation just like you did with the frame...
then the brightness and contrast just as before
then do the same for 2 more tubes from the same artist ..arrange them all within the frame..
next make the frame the active layer...
then select the magic wand selection tool, go to selections - modify - expand by 10 then selections invert and make the tube layer your active layer and hit the delete key to delete the excess...
now go to selections - none
repeat for each tube...make sure the frame is over the tubes so no edges show...smply by sliding the tube layers below te frame layer
then add a drop shadow to your frame
add the artist's copyright and your name and save your tag


No comments:
Post a Comment